A favorite function of mine that Lightwright 6 added is the ability to reconcile patch with EOS through OSC. It allows you to be precise and quick. Let’s go through how to do it. First, a recap on how to link EOS and Lightwright.
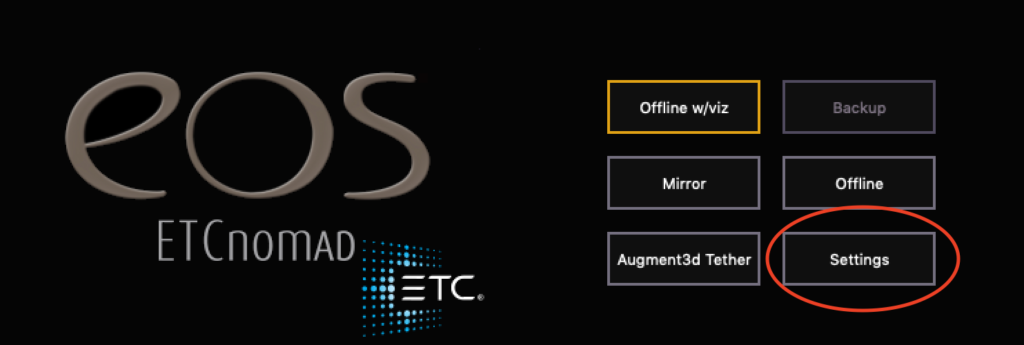
Boot up your console, or open EOS Nomad and go into the shell by clicking Settings.
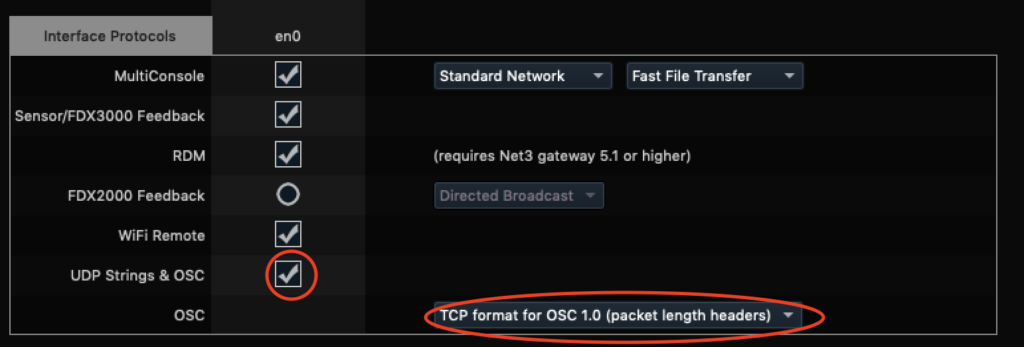
In the network tab, scroll down to Interface Protocols and make sure that UDP Strings & OSC is turned on. Immediately below that, notice that there is a pulldown menu for OSC to choose between two versions of the protocol. Breaking with tradition- you want to choose the older protocol version 1.0 NOT 1.1. This little “1.0 vs 1.1” thing is worth remembering for ANYTHING else with OSC integrating with EOS. It will save you hours of misery in the future.
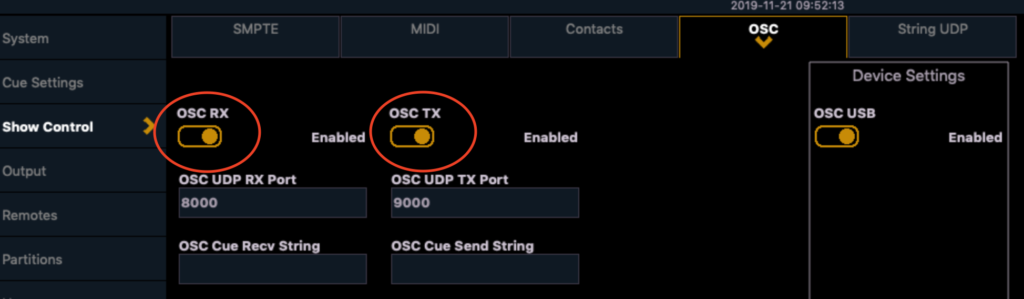
Click Accept and exit the Shell. Either sign in as Primary or Offline. Start up Lightwright if it’s not already and make sure both are in the same show file. In EOS, go to Setup>System Settings>Show Control. Click on your OSC tab. Turn OSC RX and TX on. I have the ports numbered (8000 and 9000) for use with TouchOSC, but they are not relevant to Lighwright.
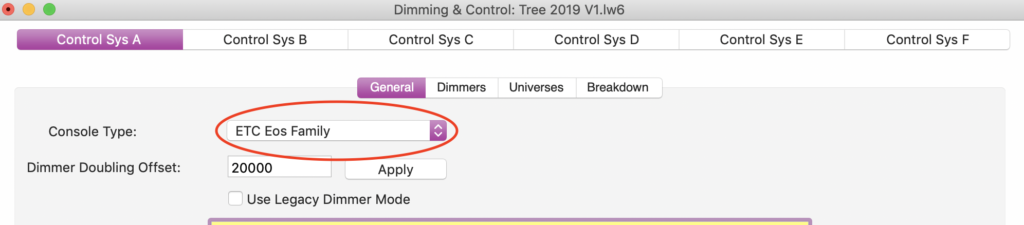
In Lightwright, go to Setup>Dimming&Control and under Console type, select the only choice: ETC EOS Family. Exit the window.
Now click the Light bulb shaped icon in the upper right hand corner.

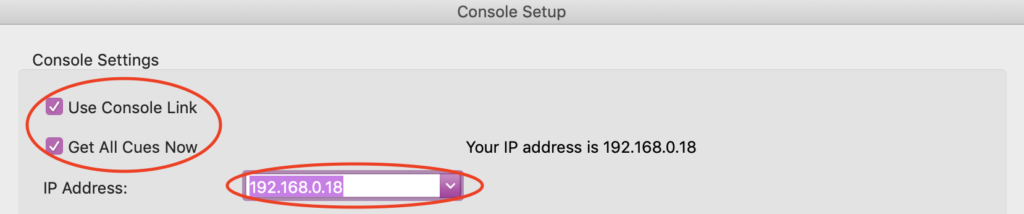
In the dialogue box that opens, input the IP Address of your console (found by pressing About in EOS and reading the info on the left under IP). If you are on a PC, and are using both Lightwright and EOS on the same computer, you will need to enter 127.0.0.1 instead of the console IP. Click the box at top for Use Console Link and I would suggest clicking the box for Get All Cues Now if you have any in the board. Click OK at the bottom. Depending on the show file size, it may take a full minute or two for the first sync to be complete.
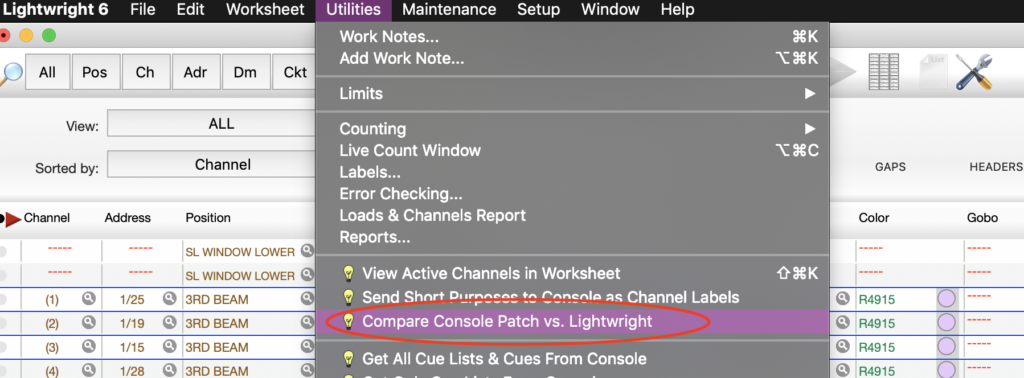
Now that’s done, on to the new stuff: Go to Utilities>Compare Patch vs. Lightwright.
Lightwright will produce the familiar Report window, but there are just a few things to know, since there are things Lightwright cannot do automatically. Let’s look at mine.
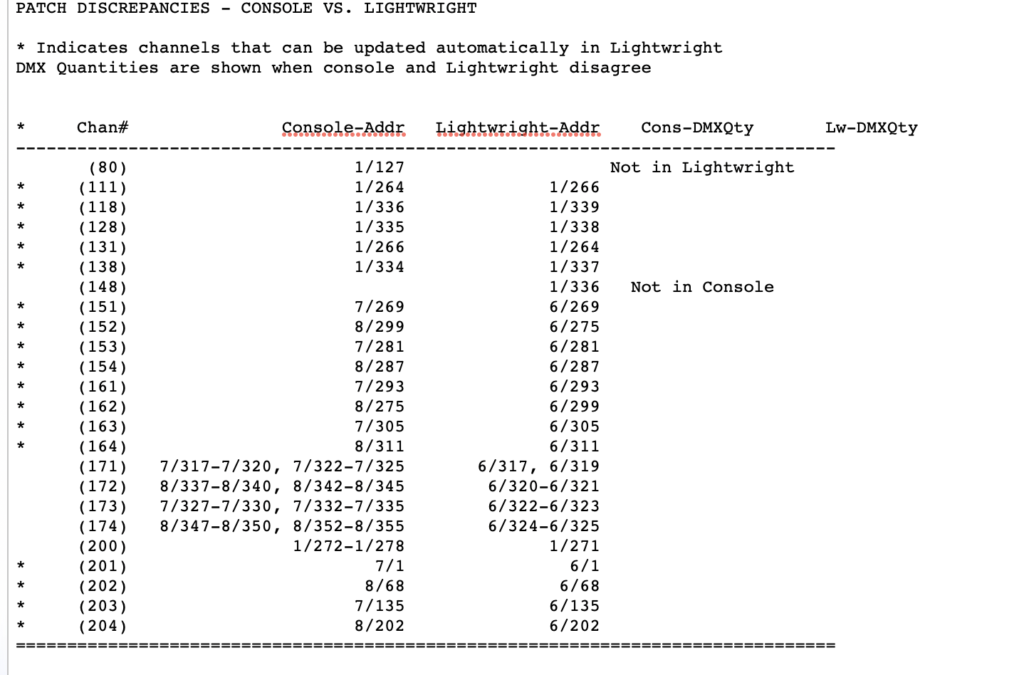
All the things with an asterisk can be automatically corrected. My working method is to confirm in the center bottom of the window {Fix Lightwright Patch} and then re-run the Compare Console Patch command again and view what remains. Conveniently, I think we have an example of every other reason Lightwright wouldn’t be able to reconcile.
Channel 80 is easy- it’s not in Lightwright, and LW isn’t able to add records by itself. Add the fixture, and the issue is solved. Channel 148 is the equal opposite- the channel is not in the console, so I remove it from the Lightwright file.
171 through 174 is an interesting issue to me. I had assumed that UV Led lights would have only one parameter. Foolish me. Curiously, when I correct the DMX quantity in Maintenance>Instrument Type, Lightwright still won’t make the correction. The issue is in how I set up the fixture in LW- I didn’t want zone control over a tiny LED light, so I made the patch a multi-dimmer fixture instead of a fixture with 4 parameters all responding as one. Regardless, it’s time to do a manual correction it is.
Last item is channel 200 (house lights) which takes 7 addresses, and Lightwright only has one entry for it. Since I would rather not add a series of House light channels to LW, I manually corrected it.
I hope you find this kind of tutorial as useful as I do. It’s my mission in life to automate as many things as possible between software/hardware to only have to enter information once, and then have it tracked across platforms. What are the Great Non-automated tasks in your lighting life? Comment below, and maybe we can figure out a working method. Happy reconciling!