Welcome to part 4 of Live Event to Film Programmer. Last week we went over a ton of stuff concerning prep. Does that mean we’re done with it? Heck no. We’re just beginning.
This week we will focus on making color palettes. Let’s start with the bad news- you cannot trust the CCT encoder on your console to actually give you what it indicates. Depending on the quality of the fixture, it may be close (off by up to 100), but close isn’t the standard we are chasing. So you’ll need to get a light meter, a dark area, and become familiar with the green/magenta shift. Let’s dive in.
First- I know we talked about profiles and settings, but it’s worth repeating here to make sure all of your settings match per fixture type. I was shocked by how much a single setting being different can radically alter a color rendering or an output value. So double check your work.
Next- you need a dark area. As I’ve almost always prepped in a shop, this is remarkably hard to accomplish. My fellow electricians have built me little forts of blackout panels to place fixtures in, but honestly, finding a storage room with no windows is what you want. ANY other light will taint your meter results. Limit it as much as possible.
What’s on the List?
Palettes in film tend to span from the lowest the fixture can do to the highest. Do you need every 100 CCT in between? No. My current list of CCTs include:
- 1750
- 2000
- 2200
- 2400
- 2500
- 2600
- 2800
- 3000
- 3200
- 3400
- 3500
- 3600
- 3800
- 4000
- 4200
- 4300
- 4400
- 4500
- 4600
- 4800
- 5000
- 5200
- 5400
- 5600
- 5800
- 6000
- 6500
- 7000
- 7500
- 8000
- 8500
- 9000
- 9500
- 10,000
In addition, I have Sodium, Metal Halide, and a complete trip through the rainbow of colors in full saturation, 75%, 50% and 25% saturations.
Meet the Meter
The first time someone handed me a light meter, I just stared at it blankly. Almost invariably, you will be handed a Sekonic light meter of some age and type. It’s important that you are using the Gaffer’s meter (or the BB). You want to use whatever meter they may choose to check something on set with to give yourself the best chance of success.
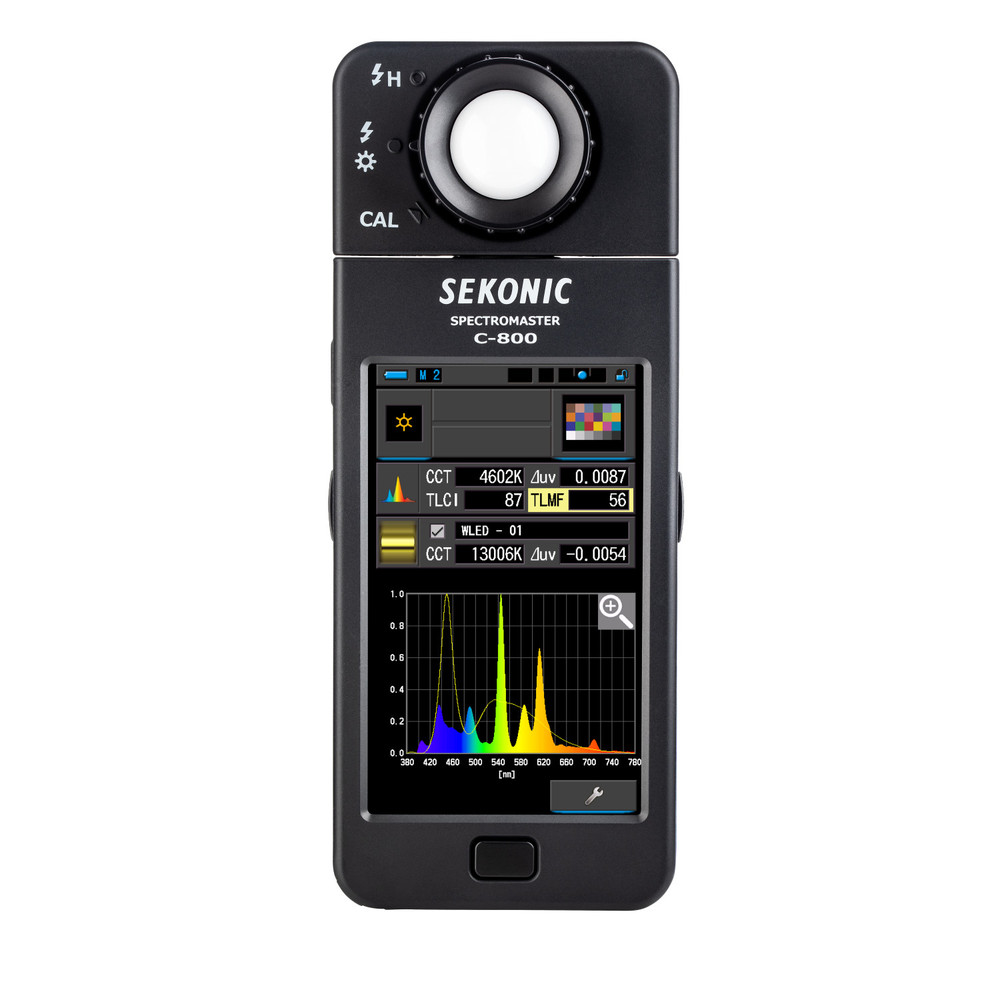
What is all that stuff? Well, the important bits are the fields that say CCT and uv. CCT will obviously tell you what color temperature the light is. The uv reading will tell you if the white has skewed too much towards green or magenta. I was surprised how much the magenta/green shift being off can influence the CCT reading itself.
When you turn the meter on, it may ask to be calibrated. Twist the ring that surrounds the thing that looks like a ping pong ball (which is the sensor) and rotate it till it points to CAL. The machine will do its thing then you can rotate the dial to the middle position.
Point the sensor at the light and press the button (on the right usually as you face the unit) and it will take a reading. You will need to tweak your green/magenta shift to try to get the uv reading as close to zero as possible. You want accuracy to at least the hundredths place, not the tenths place. Press the button again, then adjust your CCT encoder to get the desired CCT. Save the reference, then move on down the line. It’s a lot of work and it can be made very slow if you have an older meter that takes 2-4 seconds to show you meter results.
But Wait, There’s More
In order to make color (as opposed to CCT) palettes, it’s important to understand the Color Crossfade parameter. When that is set to zero, the fixture cannot mix a color, it will only output CCT white light. When you bring the Color Crossfade value to full, you can now use all the emitters on the fixture to mix any color you want. At the least, I would recommend:
- Red
- Orange
- Yellow
- Lime
- Green
- Mint
- Cyan
- Azure
- Blue
- Purple
- Magenta
- Pink
Remember that all the different fixture types should have similar, if not identical, representations of these colors. I personally use an Astera AX5 as a reference fixture to make matching easier.
Why do you need these? They are a starting point for any sort of specialty lighting. A water effect needs a color to start with, right? Ditto a fire effect (assuming a rather unrealistic fire effect, of course). What if there is a neon sign and your gaffer wants to push that color more with some of the truck package? Having a basic color library of palettes is useful. That said, if you run out of time, drop it and wing it on set. But don’t forget the Color Crossfade parameter!
In the next installments, we will discuss the many apps you are expected to run and their “quirks”, a basic approach to setting up your console cart, before we walk through your first day on set. If you have burning thoughts of things I missed, please be so kind to write them in the comments so we can create the best resource possible. Happy programming!
7 comments