I know most of us would rather have someone else make our profiles for us. Usually, so do I. But sometimes, it makes more sense to do it yourself. Why? Let’s say you have a fixture like a single pixel titan tube. I typically make 50 CCT color templates and 100 other color palettes that step through the rainbow at various saturations. That’s a fair amount of work. But if I need a four pixel titan tube and I use the pre-built one from the Eos library, none of my color palettes work. Of course, I can copy the color palettes over to the new light, but it gets complicated as I add custom colors that I mix as the Gaffer and/or DP request them. It’s tough to remember to copy all this data to every place it needs to go. But if I make the fixtures myself, every time I add a color palette, they will all instantly work across all the fixtures. How do we use this? By reusing Cells.

I’m starting with a Titan tube in M91 in single pixel MC mode. I’ve already made three color palettes for examples. (If you don’t have the MC version, you can change the fixture into one. Be sure to reassert By Type on that fixture for all the color palettes again, since they often lose that in translating one fixture type to another.)
Go to Patch, touch {Type}. In the lower left hand of the screen, select {Show}, which will show you all the fixtures currently in your show file. Once you have done that, press {Edit}.

You are now in a spreadsheet view of the fixtures in your show file and this is where you can create a new profile. In the lower left hand corner, press {New}.

Again in the lower left hand corner, press {Label}. I named my fixture Titan 4 Pixel. You do you.

In the upper right hand corner of the lower third of the screen, press Save Fixture.

To the left of where Save Fixture was, press Create Multicell.

Click the {+} that appears on the screen.

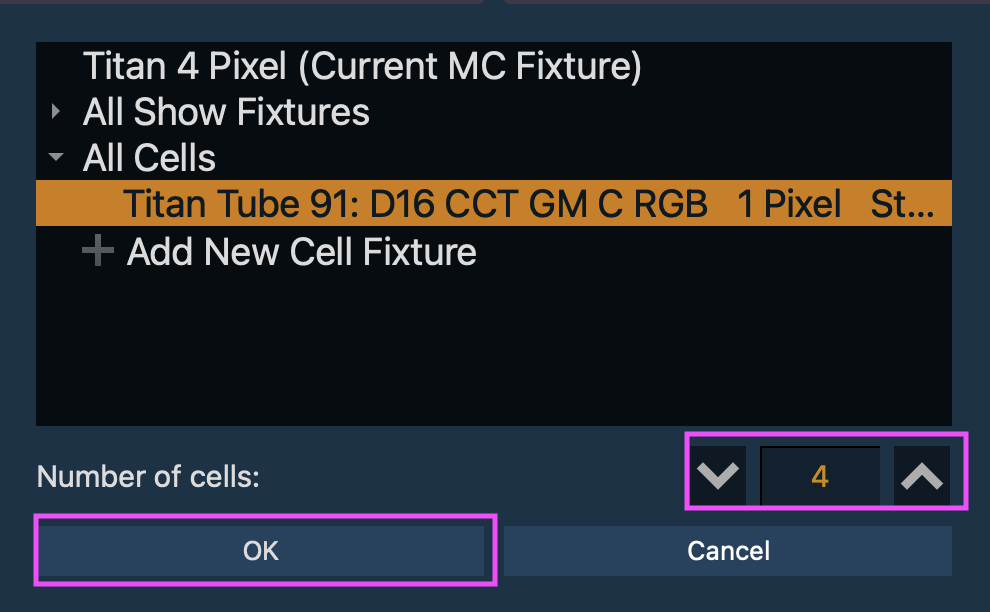
Select {All Cells} and it will show you the Cell from the original single pixel Titan Tube. Select it. In the dialogue box, specify 4 cells, then press {Ok}.
Next to the Cell you just added, click where it says DMX Offset. We need to correct these so the starting addresses for each cell is correct. (This is because we had to create a Master cell and it automatically assigned an intensity parameter.). Change the numbers to 1, 9, 17, and 25. Click where 2, 10, 18 and 26 are.

In the dialogue box, click on each number to correct each one.

When complete, click Save Fixture. Over in the list on the left of fixtures, select the new fixture you’ve created. Click the arrow on the side to open the Master/Cell. Select the Master.

Over on the right hand of the screen, we need to tell Eos the Master intensity is actually virtual. Do this by clicking where it says “8b:1” and entering 0 as the address. Eos will automatically change the intensity to Virtual once you have done this.

Click Save Fixture one more time.
That’s all there is to it. As long as you made your color palettes By Type on your first fixture, they all now work on your new fixture. And, of course, all new color palettes you create for one fixture will work on all your fixtures.
This is been a huge benefit to my programming life and I hope it will be for you too. What little tricks like this do you use in your programming/setup to save yourself work? Hit me in the comments.