Automate your light cues for a musical with vamps and other variables.
(Approach)
A while ago, I got a gig to light a small musical in a black box. Key elements on the project were:
- Rock score
- A musical performed to track- but with looping, vamps and other variables of time included.
- One operator for both sound and lights.
I thought this would be a perfect opportunity to dig deeper into timecode and MIDI Show Control.
For those unfamiliar, timecode is a way to use a very specific counting clock to automate actions in the console. Most often it is used for cues, though nearly any function in the console can be set to timecode. For this project, we were using MIDI timecode. MIDI show control (MSC) is a MIDI protocol that is able to issue commands between entertainment equipment, such as “Go Cue 5.”
(Show Me the Show Control)
The first thing I needed to do was make sure Show Control was set up on the Element. Luckily, ETC has an excellent resource for any Show Control needs: The ETC Family Show Control Setup Guide, Rev B. I downloaded it, grabbed my QLab-licensed computer, a MIDI interface and a MIDI cable, and headed to the theater to get familiar.
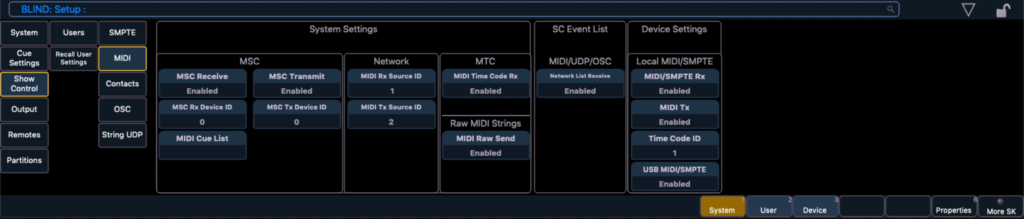
First: Tell Element to listen for Show Control. Press [Setup], [Show Settings], [Show Control]. Make sure {MSC Receive} and {MIDI Time Code RX} are engaged, and set your {MSC Receive Channel} to your preferred number. If using QLab, save yourself some programming time and select 0, as QLab defaults to MIDI channel 0 and it’s one less thing to think about.
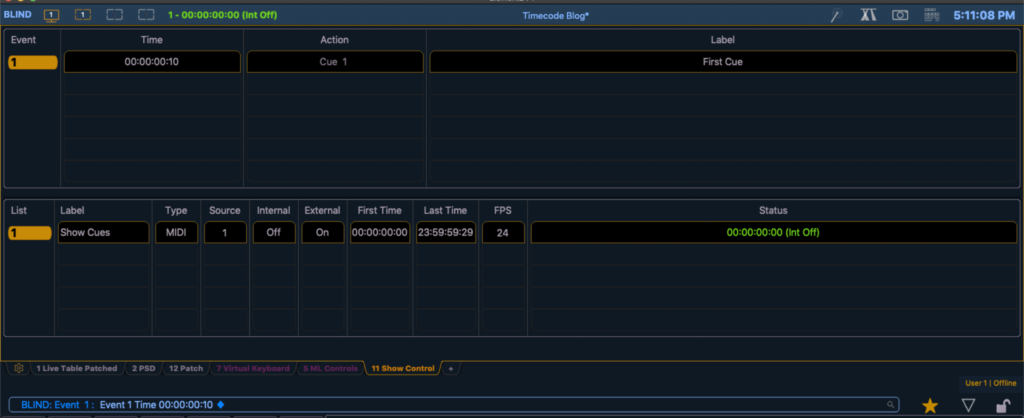
Next, add a new tab for Show Control to the desk by clicking the [+] on the “Add a Tab” area and choose {Show Control 11}. Show Control is divided into Events at the top and Lists at the bottom. You can’t do anything in Events until you specify a list.

In Element, there is only one cue list possible, so type [Event} (Softkey 4) [1] [/] [Enter]. Click under {Type} and specify MIDI Time Code for this list by then hitting Softkey 2 [Midi]. Next click under {External} to set it to On. A green timecode will appear under {Status}. Specify {FPS} as whatever you choose. I went with 24. (Whatever you choose, remember it. You’ll need to make sure your QLab generates code at the same frame rate!) Success!
(To the (Q)Lab)
As QLab is an industry standard, I’ll only include some basic things here for you to get a fast start in your process. You need three types of cues in QLab: MIDI, Timecode and Stop.
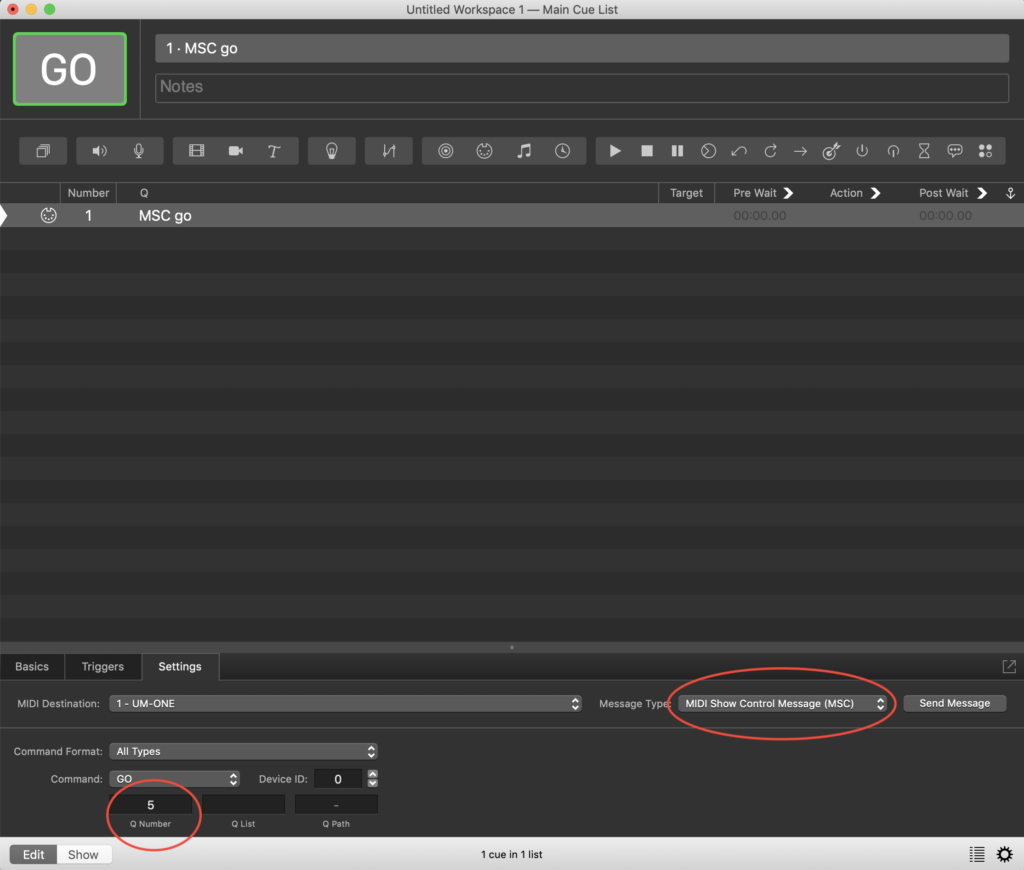
MIDI, obviously, is used for MSC commands. Once you add your first cue, click the Setting tab in QLab and set Message type to MIDI Show Control. If you set your MSC Receive Channel to 0 on your console, you can leave the default. Then just add the cue number you desire below in the same tab. No need to specify list.
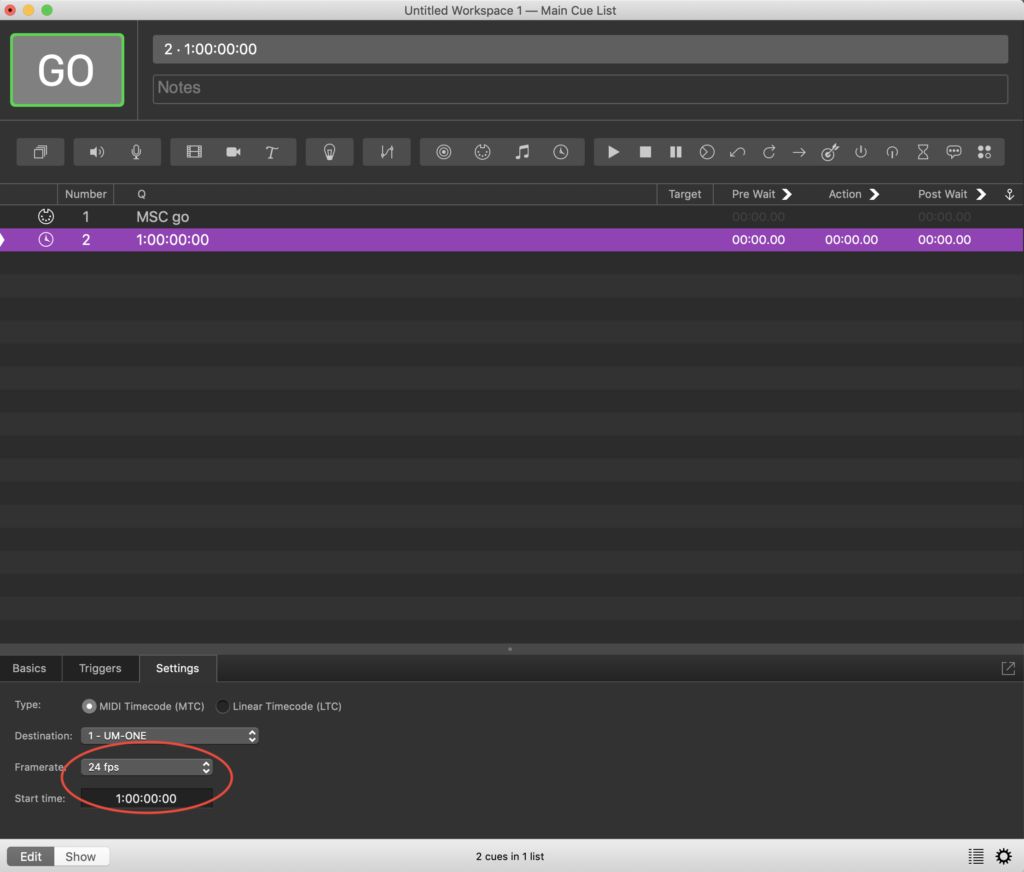
Timecode is obviously the counting clock element. Add a Timecode cue, then click on the Settings tab. Specify your desired start time (Hour:Minutes:Seconds:Frames). Set your framerate as 24 (or whatever you choose as long as Element and QLab agree!)
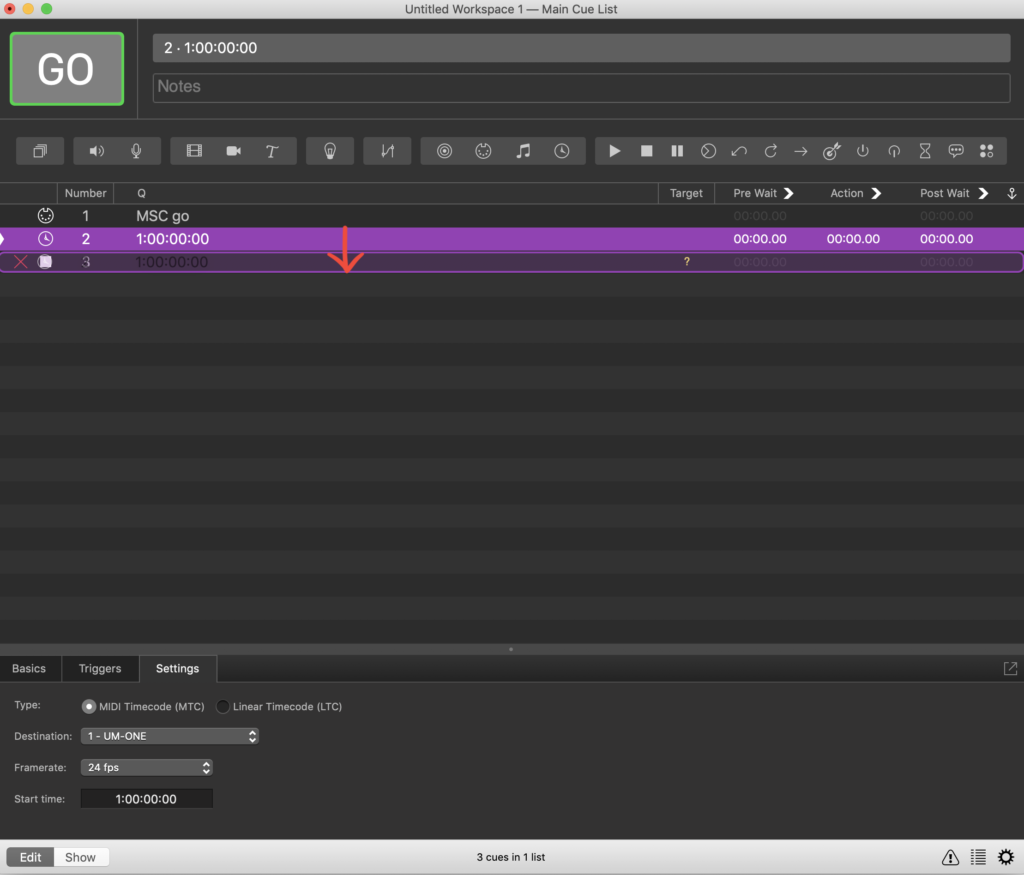
Stop is how you will stop a timecode clock. You drag a Stop cue in place and a red X appears. That’s because you need to tell it what it is stopping. Drag and drop the timecode cue over the top of the Stop cue and the red X disappears.
(Are You on the List?)
Now we need to tell Element when actions should happen in the timeline. No need to tell Element anything else in order to do an MSC cue- it will instantly respond. There are two methods-Manual entry and Learn.
Manual: Type [Event] [1] [Cue] [1] [Enter]. Now you need to assign a time. Click on the window below {Time} and enter 00:00:00:10 [Enter]. Cue one will now fire when it sees 00:00:00:10.
Learn: Go to the Show Control tab, select the List, press the [Learn} button, start your Timecode from QLab and press go! Element will create a list of everything you did. Be sure to press Learn again to stop Learning when you finish a sequence. (I ended up with many accidental Event entries when I forgot.) I found this much faster to use this method and then adjust time for corrections.
(Time Flies By)
I had been warned that Timecode takes a portion of a second to get going. So I tested how quickly Element would respond to the new timeline. I first tried a cue set to go at 00:00:00:00. No go. By the time Element saw the timecode, the cue had passed by, and Element did not fire the cue. I found that I could reliably get any cue to start with 10 frames out of 24 per second having passed by. So while 00:00:00:00 failed, 00:00:00:10 was a success every time.
Since it’s possible to fire more than one timecode cue in QLab, I was curious what would happen. What would the console do if it saw two timelines at once? The answer is nothing. No cues would fire if two timelines fired. Once in first tech the light cues stopped firing. I discovered that I had somehow deleted a Stop Timecode cue before I started the next Timeline. I was glad I knew what was (not) happening from experimenting.
(The Show Control Goes On)
My work flow quickly shaped up to be:
- Start of a new song/audio file, setup QLab to auto-continue into an MSC command to fire the cue at the very top of the music.
- Have QLab Auto-continue to fire a MIDI Time Code cue (separated by ten minutes for each timeline) to pick up the rest of the song.
- Add MSC cues as needed for moments over dialogue or moments that happen during the song that are not the same every time.
- Finish song and stop the timeline in the next cue.
When revising, I found it easiest to go to the Show Control Tab, mouse click on the Event, mouse click on the time, and then enter the adjusted time. Entering the time was a bit disorienting- you have to start the number from the hours, but it will display in the frames at first. (Meaning- the number travels from right to left.) For some reason, this took some getting used to. I also found it was frustratingly easy to have more than one Event highlighted at the same time- so beware of that. You may end up with two cues firing at once if you don’t catch that. Oh- and a helpful detail- if you need to add an event mid-cue stack, you can add the cue at the end, and when you add the timecode time, the console will automatically place the cue in sequence AND RENUMBER ALL EVENTS AFTER. Good to know when taking notes that event renumbering is something that will happen.
True to my goal, I spent very little to time on the sound computer after I built the initial cues in QLab. I love the perfectly repeating timing, and my operator loved pressing go a little over a hundred times during the show rather than 400.