I feel strongly that Nomad is a very important product since it gives access to Eos to people who might not otherwise get to touch a console. It’s the Programmer’s Paradox- they won’t let you program until you are good and the only way to get good is to program.
A while ago, I wrote an article about getting the most out of your Nomad where I focussed on tools and tricks to help input data into nomad. In my film work, I’ve recently identified a need to create a very small nomad rig for me to take on process trailers (or other unidentified adventures). My gaffer really wants effects on faders, so I need to have faders. As I mentioned in my article last time, I feel that Showcockpit is the programming answer for PC nomad users who need to map any MIDI device to controls on Eos. I’m going to walk you through the whole process of what I’ve done. What I bought, how much it was, and how to program Showcockpit to get control of your faders.
Purchases

I went with a Korg nanokontrol2 for my controller. Sure I’d love to have flying faders, but a small setup is important to me. The other drawback is there are only 8 faders. However, there are eight encoders as well, so you could map two of them to act as faders. It cost $70 with free shipping. Readily available at any musical supply store (support your local vendor if you can) or from B and H or Amazon or dozens of other retailers.
Showcockpit
Showcockpit is equals parts awesome and confusing, so let me attempt to clarify how this works. Showcockpit has a base price, which is 30 Euros. For that, you get a basic license, but I’m honestly not sure what it can do. From there, you can buy plugins. These plugins range from many MIDI controllers to VJ software mappings to console mappings like Onyx, MA, among others. Since they don’t have plugins for either this exact MIDI controller (close, but I found out that close in MIDI is very far away) and since they don’t have an Eos plugins, I bought the Generic MIDI and Generic OSC modules for 10 Euros each. Since the website itself is confusing…
Go to www.showcockpit.com. Scroll down until you see Basic Version and click where it says Select Drivers.
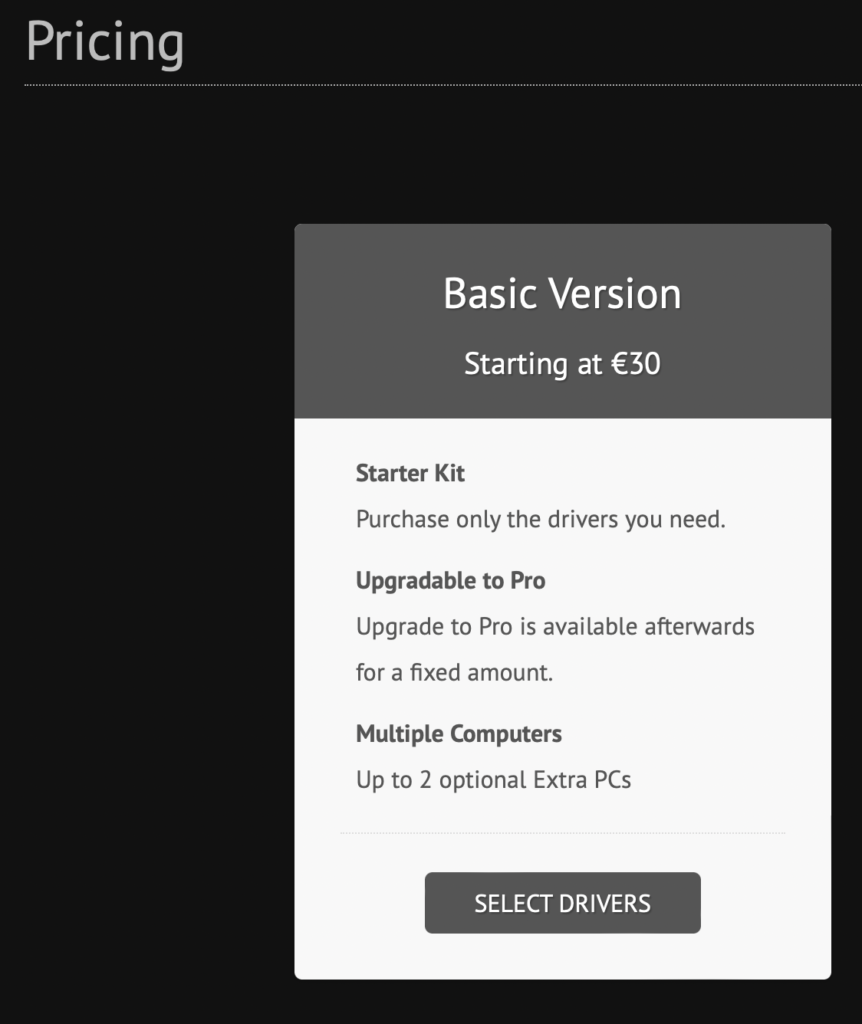
This will bring you to a spread sheet of all drivers. Add the Generic MIDI and Generic OSC to your order (which already has the 30 Euro basic plan) and pay for your stuff. Two emails will come to you. One is a receipt, the other has your License Key. You will need it, so make note of it and save the email for the future since you will need it should you ever want to add more drivers.
From the web site, download the software from the first page (link in orange at the top). Note that this contains every driver at the time of download, and you will unlock the software you have paid for with your license key.
Once downloaded and installed (again- windows only so Mac users should probably use OSCulator, which I hear good things about but have not used) click New, then click on the lowest left hand tab in the interface to get License. Input your email and your key- you need to be online for this part- and Showcockpit will think for a minute and then post which plugins you are unlocked for. Note that you can use any plugin for testing, but the program will need to be restarted after random intervals if it’s not part of your license.
Elements
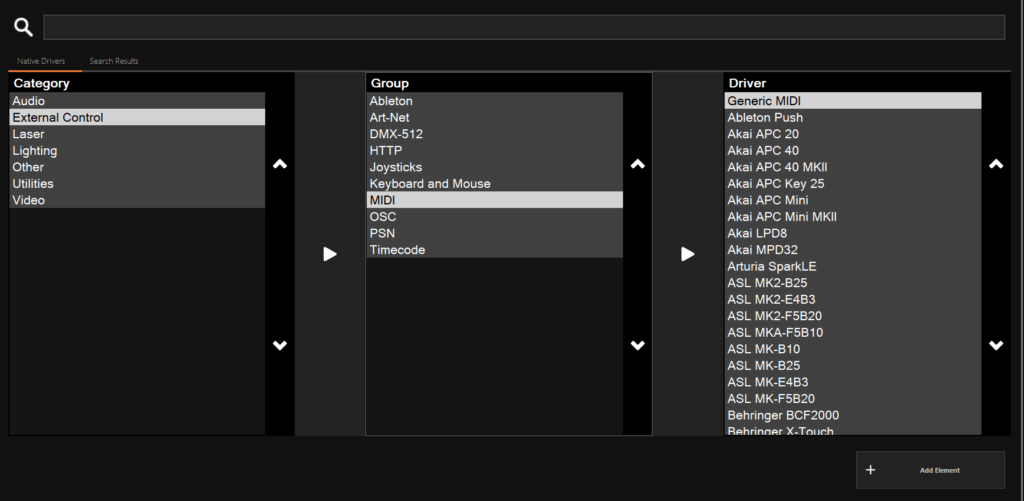
Click on the Elements tab on the left. This is where you will add the Generic MIDI and Generic OSC by clicking the plus in the upper left of the interface.
Navigate to External Control>MIDI>Generic MIDI, then hit Add Element at the bottom right. Showcockpit will prompt you to choose a name for the item if you wish. I left it as-is.
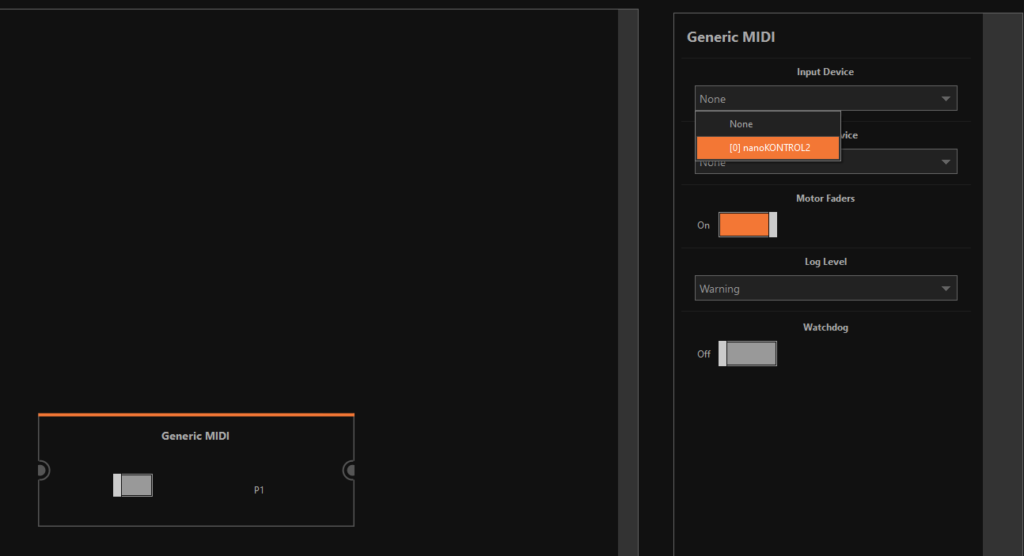
Select the new item in your Element work area and the top will turn orange. The right hand side will now have options for this item. Making sure you have your nanokontrol2 plugged in, select nanokontrol2 for the input and the output by the pull down menus. When complete, press the little toggle switch on the Generic MIDI item to turn it on. The switch will fill orange when you have succeeded.
Next, add the Generic OSC element by hitting the plus in the upper left hand of the screen and navigating to External Control>OSC>Generic OSC.
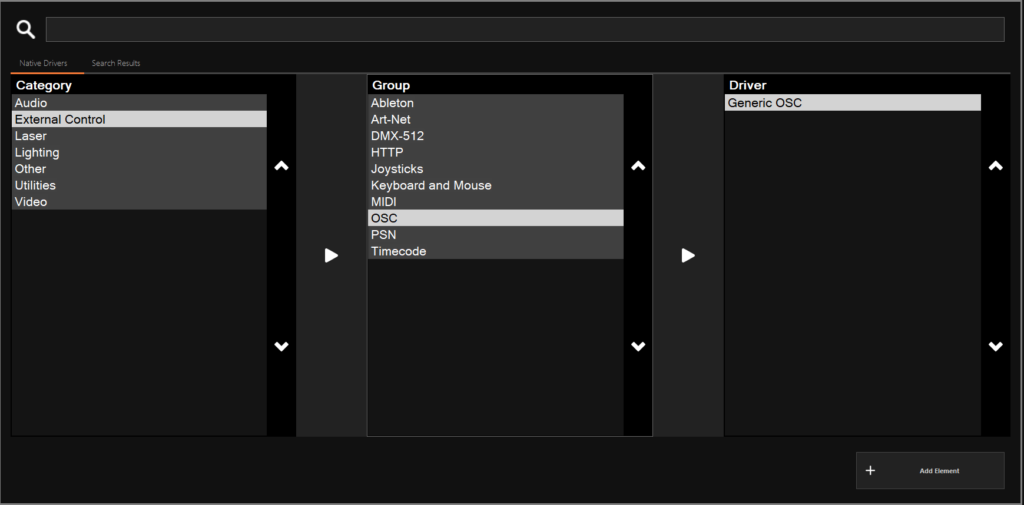
Press Add Element in the lower right hand corner to confirm. Again, you can name this device but I left it as it was. Select the Element by clicking on it.
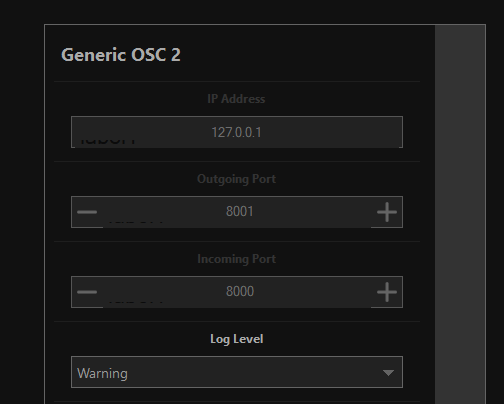
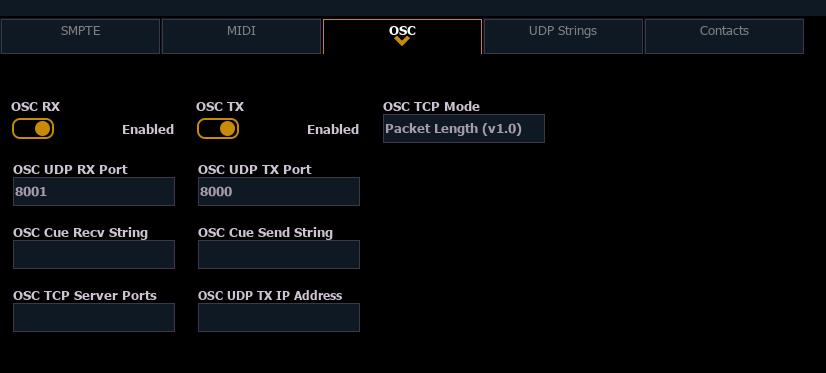
The default for this device is to use the loopback IP address of 127.0.0.1, which worked perfectly for me since the whole point is to run both this app and Nomad on one computer. You also need to assign the Outgoing port to match the number in Eos for Incoming port and match the incoming port on Showcockpit to match the Outgoing port on Eos. I’m using 8001 and 8000 for my needs.
MIDI Faders and Buttons
Now it is time to build a bunch of items in both elements. Let’s start with the Generic MIDI device. Double click on the General MIDI element. This opens a window where you can tell Showcockpit to learn each button and fader on your device. I highly recommend doing this systematically and naming every button and fader as you go! Otherwise it will be confusing when it is time to attach the MIDI triggers to the OSC commands.
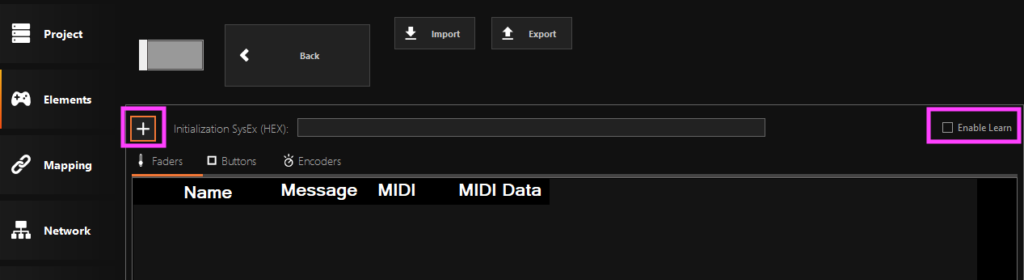
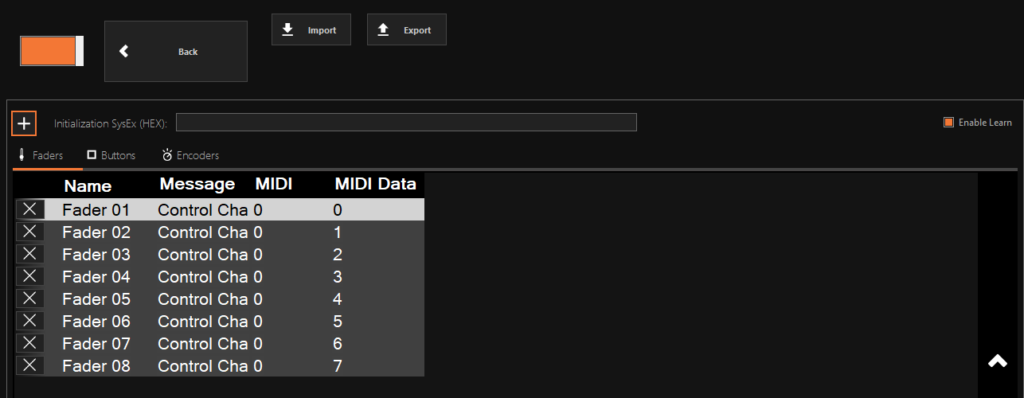
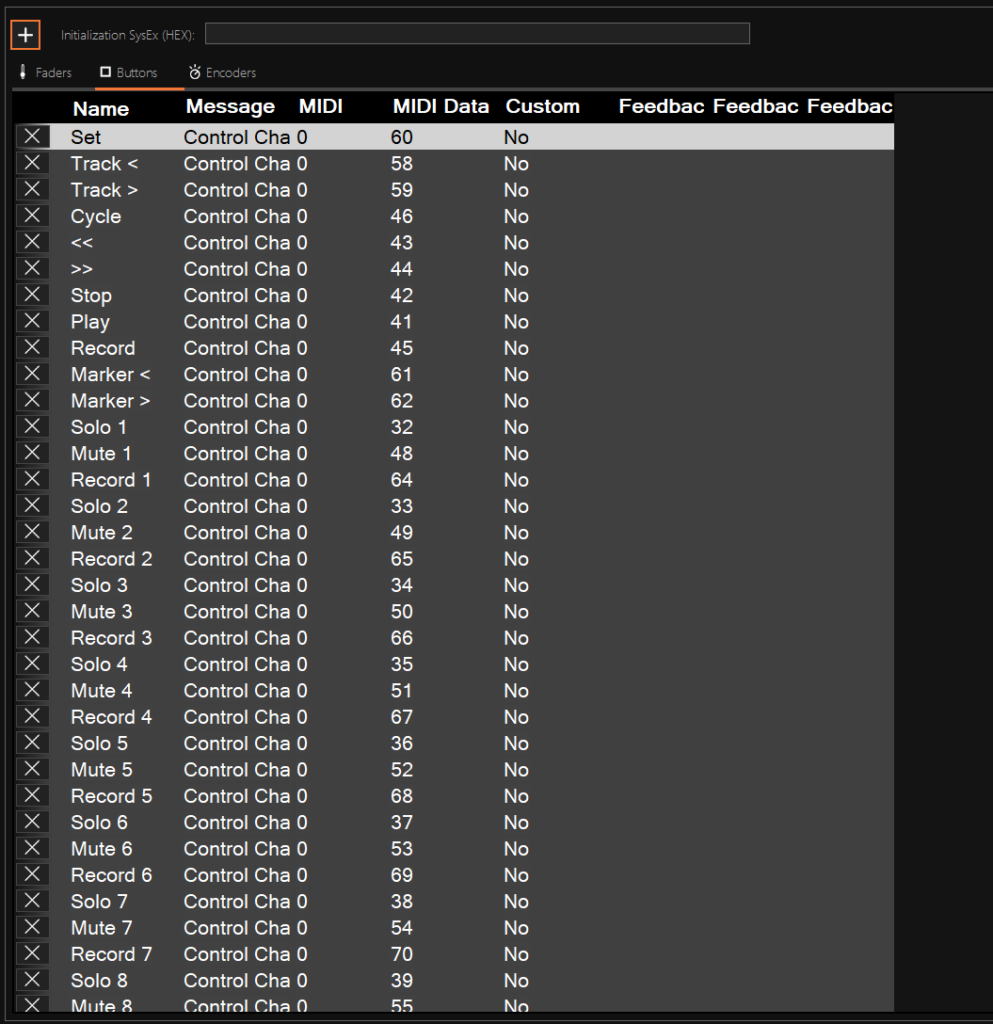
On the far right side of the window is a little box you can tick to enable MIDI learning. This is an easy function where show cockpit becomes aware of what items you have on your controller so you can route them. I started with all the faders from left to right and one by one. This is extra important since you are on the Fader tab by default. Conveniently, Showcockpit names each fader appropriately if you do them in order- Faders 1-8.
Next are all the buttons. This is where I only do them one at a time and name them as I go since getting lost is bad. Switch to the Buttons tab at the top of the window.
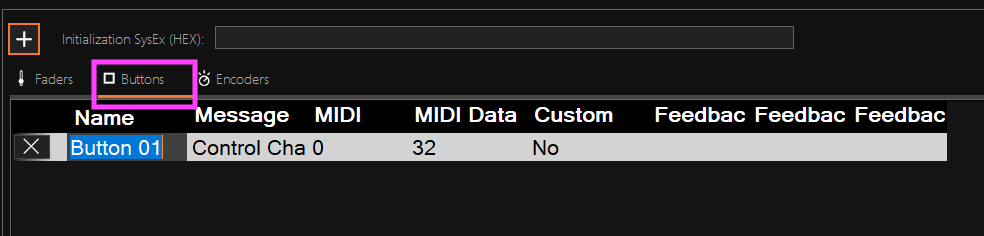
Now that you are in the right area, press the buttons in logical order and name them as you go (I named them Solo 1, Mute 1 and Record 1, as examples) by clicking once on the name Showcockpit provides. Here is an image of nearly everything I captured. The very last Record button is not able to fit on this page. Once complete, turn off Enable Learn and go back to Elements.
OSC Commands
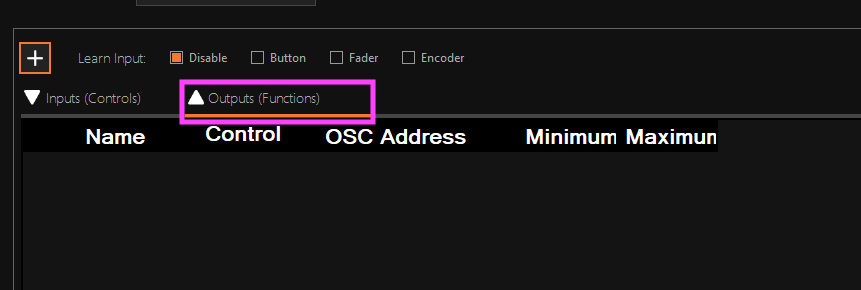
Turn on Generic OSC by clicking the large button and seeing it turn orange. Double click the Element. This interface is also tabbed, so go to the Output function tab.
Fader Set Command
Click the plus in the upper left hand corner. This will create a generic button command.
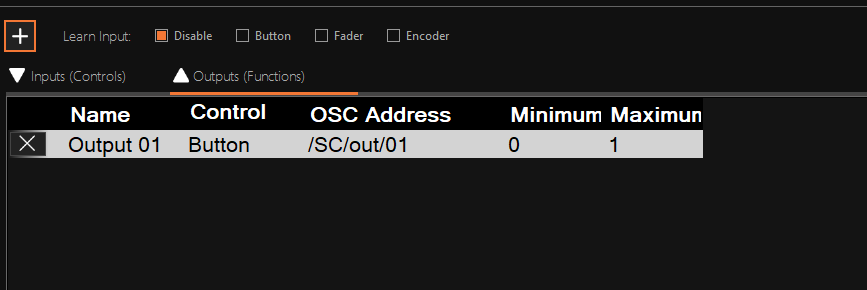
Rename to Fader 1 by clicking on the existing label. For fader control to work on Eos via OSC, at the start of each session, you need to tell Eos whether you want faders in sets of 5 or 10. We want them in 10. This command I named Fader Config. The command is /eos/fader/1/config/10 and then hit enter.
Fader Strip
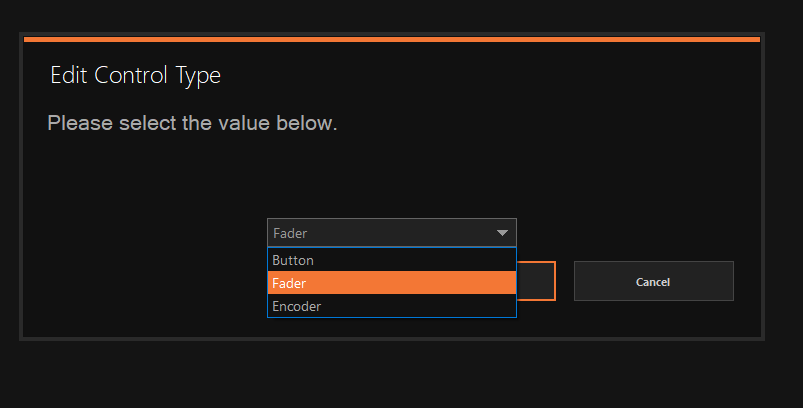
We will do one complete fader strip together (Fader, Load button, Stop button and Go button) and then you can do the rest by repeating the steps. Click the plus in the upper left hand. Rename to Fader 1, as this is for fader control. Click where it says Button and a popup window will appear. Select Fader from the pull down menu.
Now it’s time to write the osc command. Click where the existing command is (/SC/out/01) and make it read /eos/fader/1/1 and click enter to complete. Believe it or not, the values next to it of minimum 0 and maximum 1.0 are correct. 100% equals 1, so we are ready to go. Please note in the dialogue that “1/1” means Page 1, Fader 1. If you need something else, adjust the numbering to suit your needs.
Click the upper left hand corner plus again. Rename to F1/1 Load. Click once on the default command and type /eos/fader/1/1/load and hit enter.
Click the upper left hand corner plus again. Rename to F1/1 Stop. Click once on the default command and type /eos/fader/1/1/stop and hit enter. This will act both as stop and back when you are using a cue list on the fader.
Click the upper left hand corner plus again. Rename to F1/1 Bump. Click once on the default command and type /eos/fader/1/1/fire and hit enter. This will act as a bump button for a submaster or a go button for a cue list.

When you move to your next fader, be aware you will need to start each command with /eos/fader/1/2 since the 2 now represents the second fader. Obviously, change to 3 for the third fader, and so on. When you have done all the faders and buttons, click on the Elements tab again.
Connect
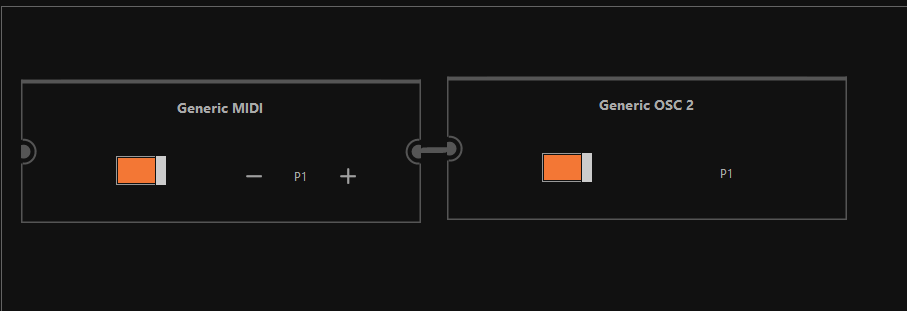
Arrange your two elements to be Generic MIDI on the left and Generic OSC on the right by clicking and dragging. Next, click on the small dot on the right of the generic MIDI element and drag it to the generic osc. This connects the two devices and routes the MIDI outputs to the OSC inputs. Make sure both are on, though I believe they already should be.
Mapping
When you hit the Mapping tab on the left, Showcockpit automatically pops up a window to align your osc commands and your MIDI items. All of your labeled osc items should be on the left with all your faders and buttons (separated by tabs for faders/buttons/encoders) will be on the right. The methodology is to choose an OSC command on the left and then assign it to a MIDI controller on the right by clicking it.
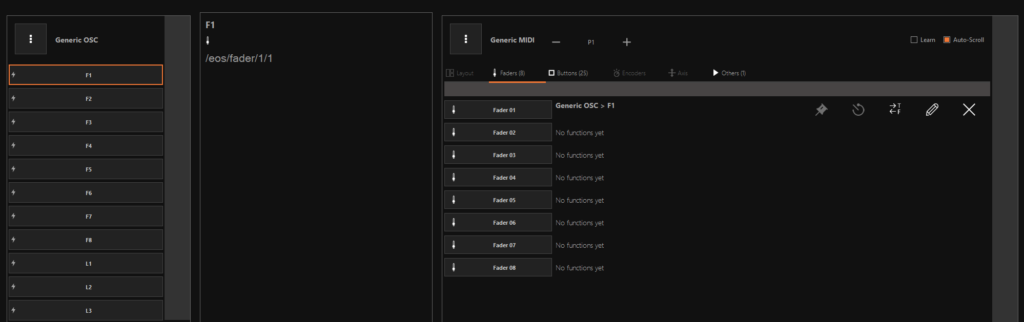
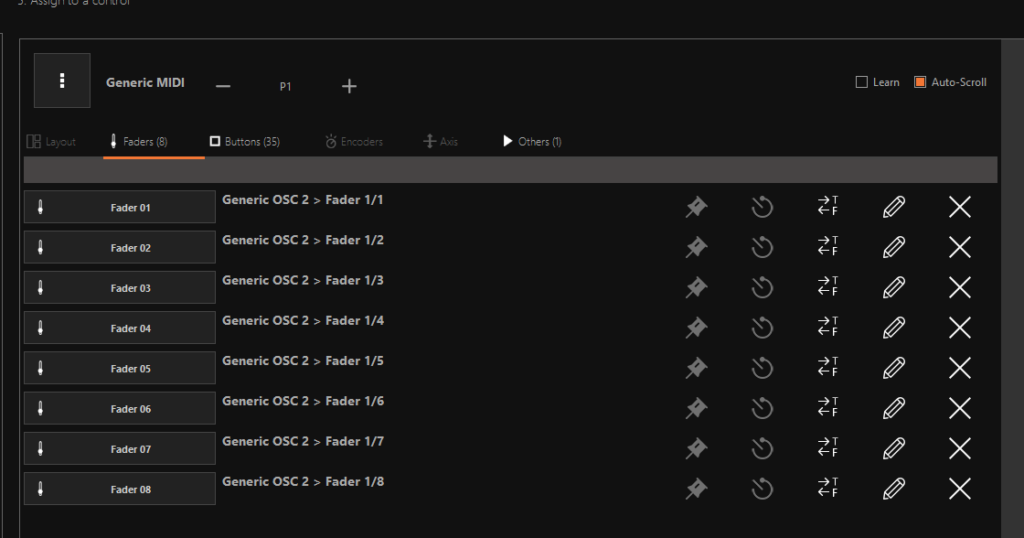
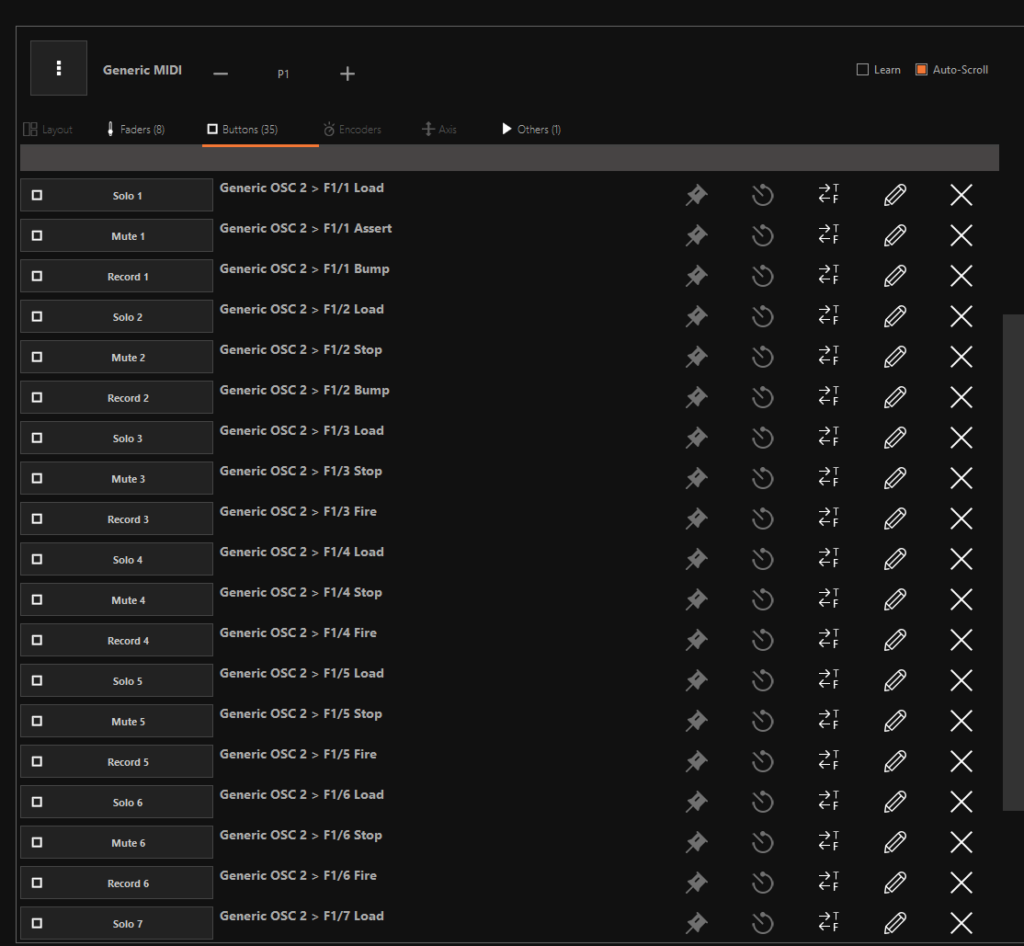
When you finish with the Fader, select the Buttons tab on the upper center of the right hand Generic MIDI window and assign all your buttons. At the end, mine looks like this.
Eos
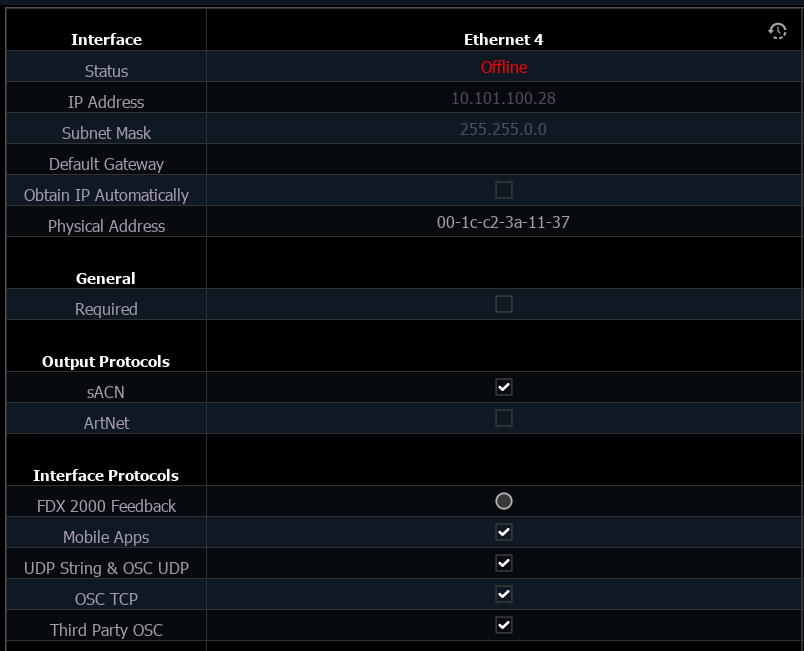
Over on the Eos side, let’s make sure that we have things set up correctly. There are two places to configure. As of 3.2.0, many OSC commands that use to be in the Shell are now in Setup>Device>Network. Make sure that OSC TCP is turned on.
Next, go to Setup>System>Show Control>OSC. If you are using my port numbers, make sure RX and TX are turned on and the ports are configured to match.
Now you need to test! Don’t forget to press your Config macro before anything else. Nothing will work without it being triggered at the start of each session in Nomad. You should be able to load, bump, stop/back/go from the nanokontrol now.
What are your favorite ways to use MIDI and/or OSC with your setup? Or- tell me about your rigs for things like process trailers and other confined spaces. Love to hear it.
4 comments