After writing the blog that I intended to finish my Drafting with Capture series, I belatedly realized that I had not, in fact, ever written the exporting Capture to Lightwright tutorial I thought I had. Mistakes are humbling, publishing them even more so. Better late than never though.
I came “up through the ranks” to programmer/designer by being a Production Electrician first, so Lightwright is an indispensable tool for me. It combines all the excellence of the best spreadsheets with an integral knowledge of electricity, lighting protocols and helps me fix mistakes before I ever load in a show. But since you are reading this, you probably already know all that. Getting info from Capture into LW is not complicated, it just has a couple of annoying things that can mess you up. Possibly important note- when I tried to recreate these steps for this tutorial on Lightwright 6.0.41.405 on a Mac, I would go through the whole process to have a bunch of empty entries. Updating to the Beta 6.0.42.413 fixed the issue.
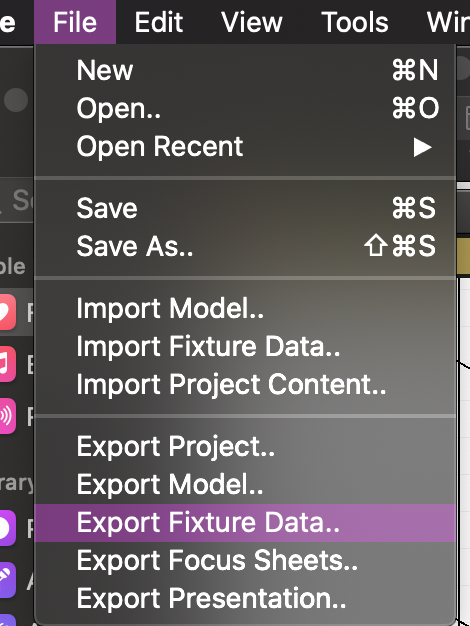
Starting in your Capture file, go to File>Export Fixture Data.
You’ll be presented with a dialogue box with some choices, all of which are hidden. From the pulldown menu (shown), you want to pick Lightwright text files, name the file and save.
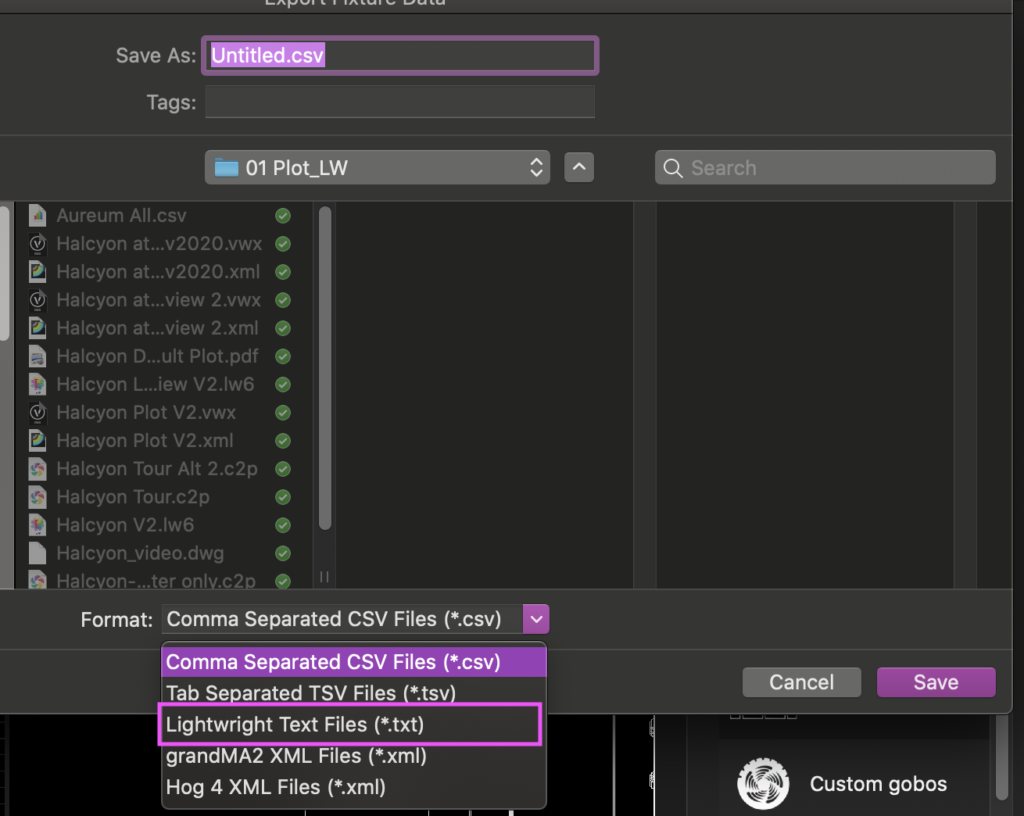
It’s worth explaining a couple things here. The reason you are choosing Lightwright Text Files is it translates a few things. I change the Addressing style of Capture from A.1 to the Lightwright-friendly 1/1. It also changes Location to be Position. The drawbacks are the info that gets left out. It doesn’t include XYZ coordinates of any kind, which are not needed in LW, but may be helpful if you plan to export from LW to your console. If you need those coordinates, you will either need to stay with the CSV export and then do a search and replace in your preferred spreadsheet to change A.1 to 1/1 (and onward through the Universe alphabet). For most needs, though, Lightwright Text Files covers our needs.
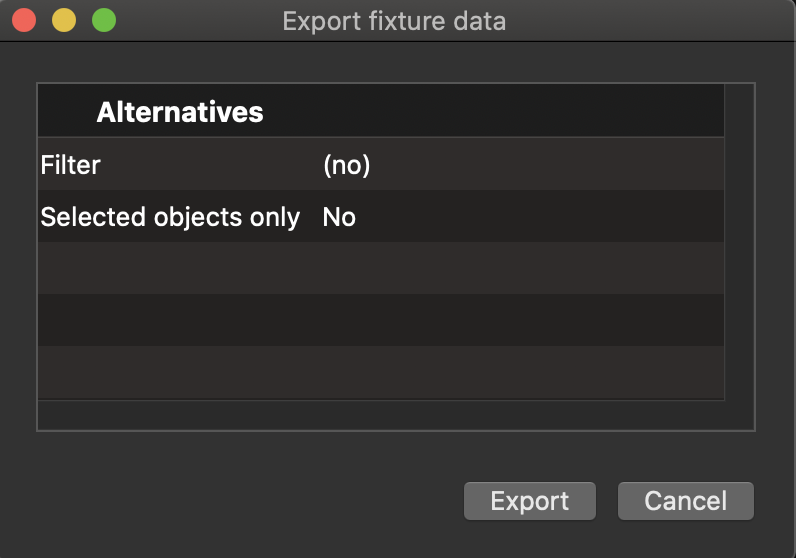
You are presented with another brief dialogue box that allows you to filter your export either with a Filter or through Selected Objects. I don’t need to change any of this, so I won’t. Press Export.
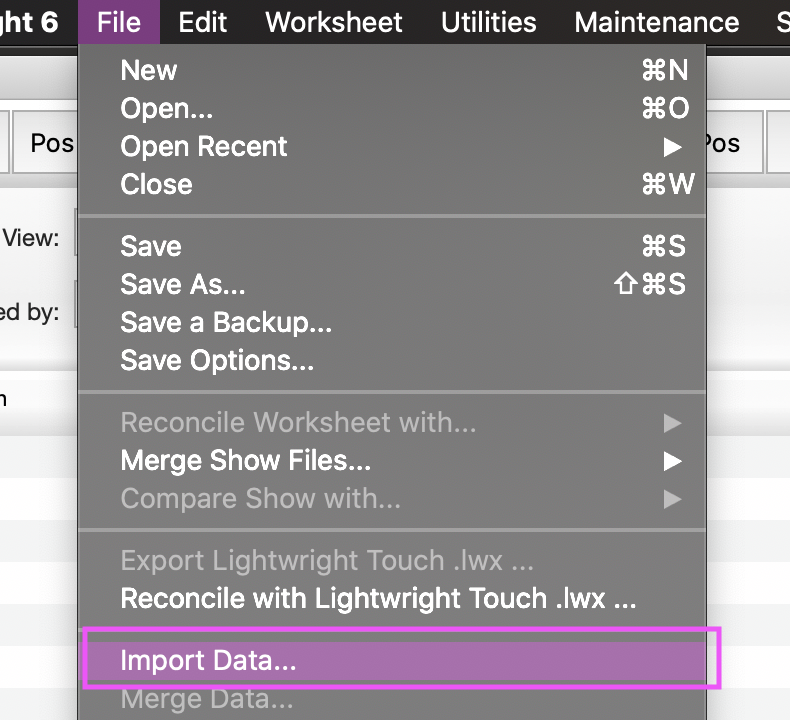
Over in LW, open a new empty project and go to File>Import Data.
Choose your file, and then LW opens a dialogue box where you can map the incoming information to the LW columns that make sense to you. Here’s what I did. Notice I kept the Capture UID and put it under the Vectorworks UID. This will make importing information back into Capture easier. Here’s what I chose:
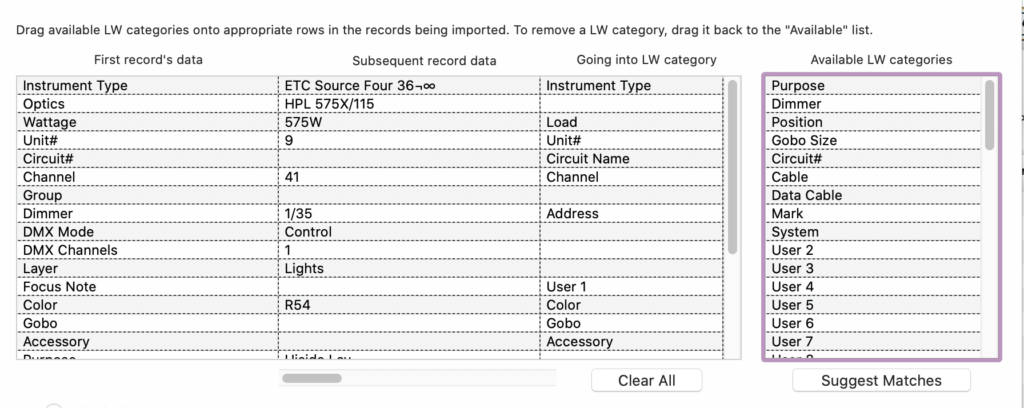
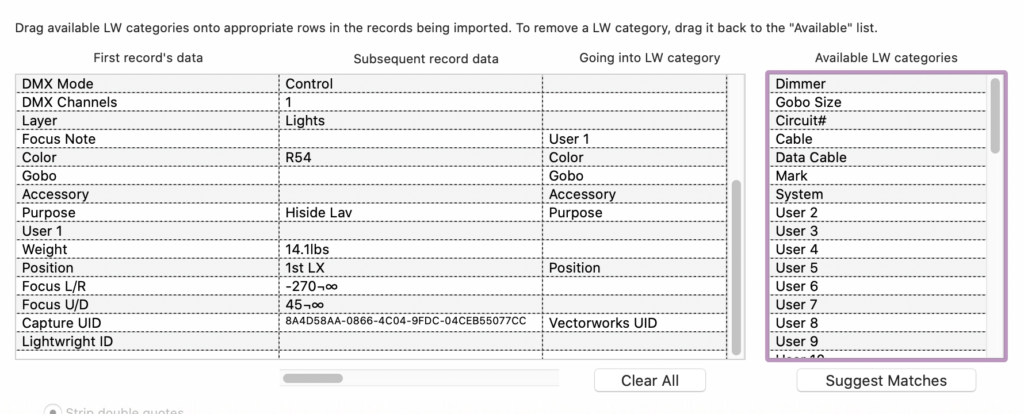
When you are satisfied, click OK at the bottom. LW will offer to save this mapping as an Automated Action. Do this! I named mine Capture Import 2021. This will mean you never need to map your data fields again. From here on out, you can go to File>Automated Actions>Capture Import 2021 and select your Capture export to be done.

From here, you can arrange your info within LW how you usually do. This workflow really works for me, as I have previously stated- I love LW and I’m lukewarm on Capture’s paperwork. Hopefully this article will make it easy and effortless to exchange information between the platforms. If you have questions or suggestions, hit me in the comments.