Real talk- sometimes I write these tutorials to force myself to do things I’ve been too lazy to do. This is one of those tutorials. I’ve long disliked how colors are laid out for film fixtures. The seemingly random placement of Color Temperature and the annoying page flips to get to Tint drive me a little mad. After teaching Custom Encoder Maps this last week (ETC Burbank shoutout), I realized I had to do the right thing and make my custom encoder maps.
My main resistance to making custom maps is it had proved very hard to make one map and assign it to all the S30-S360s (for example). You have to make the first one, then copy and paste it and reassign the fixture type. It’s a fuss, but to me it’s worth it. One last thing- I’m going to use a film fixture as an example, but obviously, you can reorganize any fixture you work with. Let’s get to it.
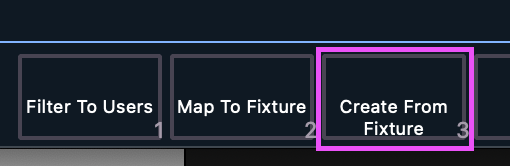
First thing is to open Tab 40 Encoder Maps. Assuming you don’t already have an encoder map, press [1] [Enter] to create an empty Encoder Map. Now look in your soft keys and notice S3 says “Create From Fixture”.
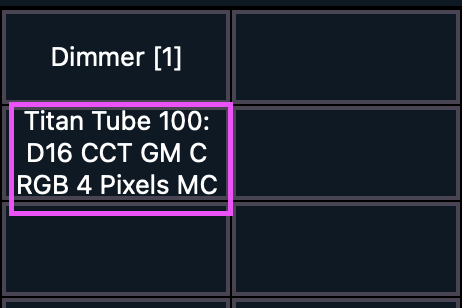
Press it and Eos will open a dialogue box to import the existing profile for you to edit. All of your patched fixtures will appear in the CIA area. For simplicity, I’ve started with an empty show file, so there is only one beyond the stock Dimmer. I’m choosing the Asteras Titan Tube in Mode 100.
Close the CIA by pressing the arrow on the right. All of the things I want to edit are in the Color category, so choose the Color tab on the upper left of the screen.
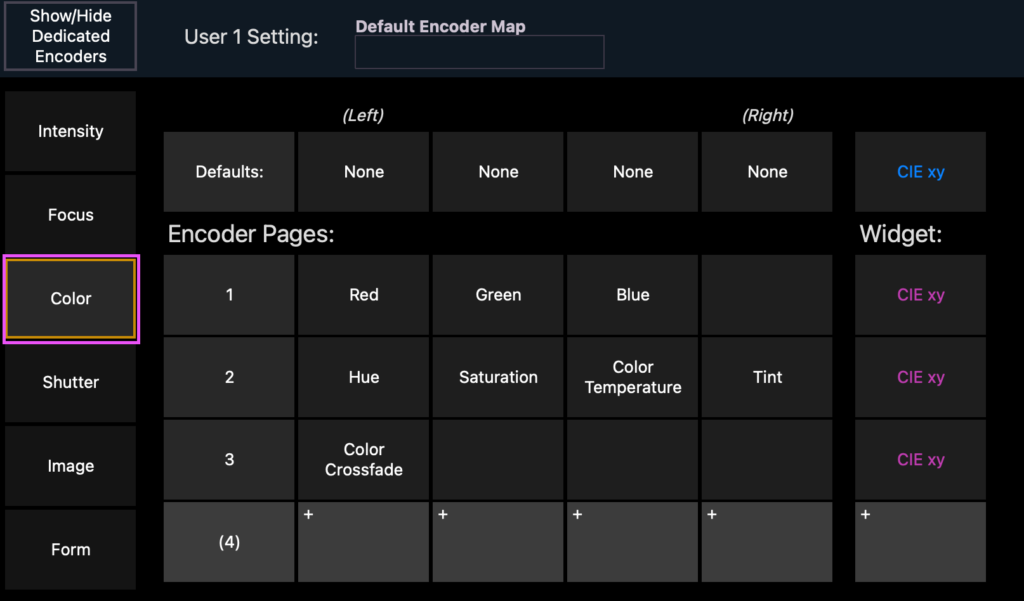
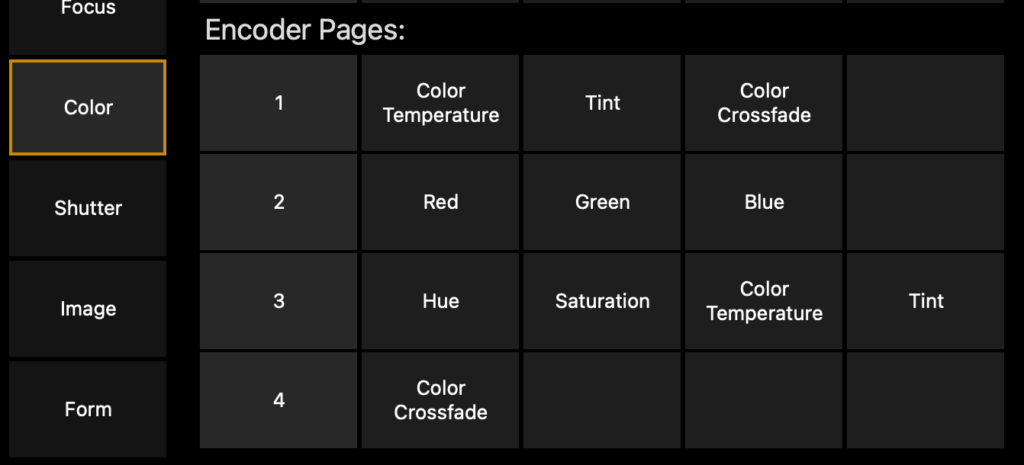
What I like (and keep in mind- this is only for example- you can do whatever you like) is Color Temperature, Tint, then Color Crossfade on the first page, RGB on the second page and Hue and Saturation on the last page. If you click where it says “1” next to Red, Green, Blue, a dialogue box appears.
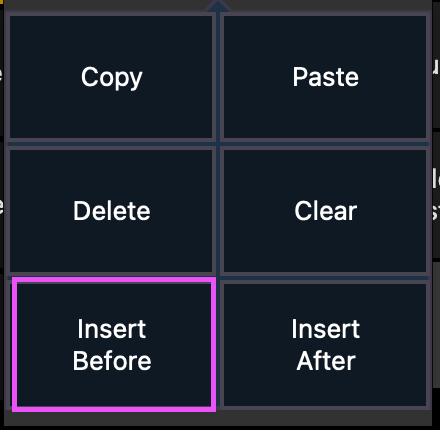
Select Insert Before. When you click on the first empty box next to 1, this dialogue box appears.

Type in “Color Temperature” in the search box and select the parameter when it appears. In the next box to the right of Color Temperature, select Tint, and in the next box to the right, select Color Crossfade till your view looks like this.
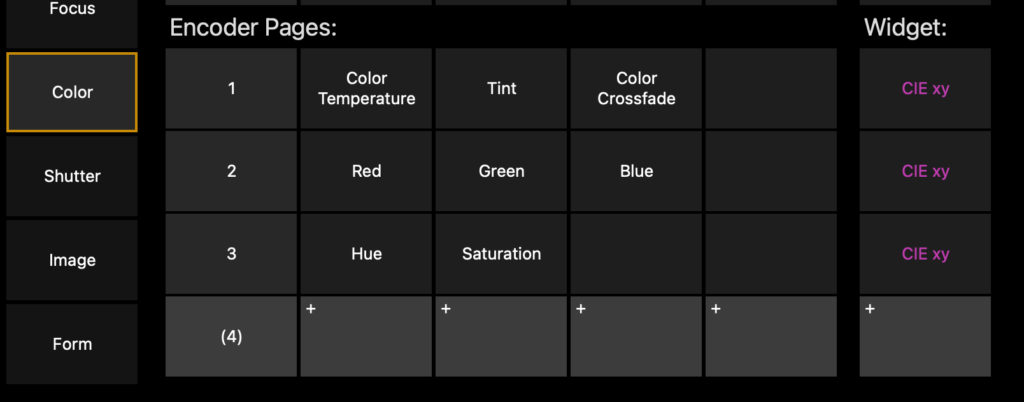
All that is left is to delete the redundant parameters down on rows 3 and 4. Click on each tile and select Delete. You should end looking like this.
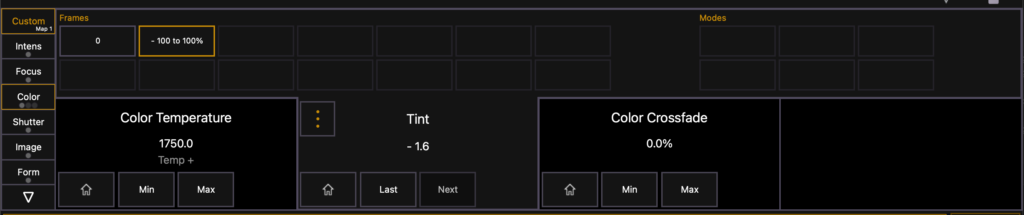
Now the only thing to do is go to Live, open your Encoder Display, go to your Color Parameters, then click on Custom if it’s not already turned on.
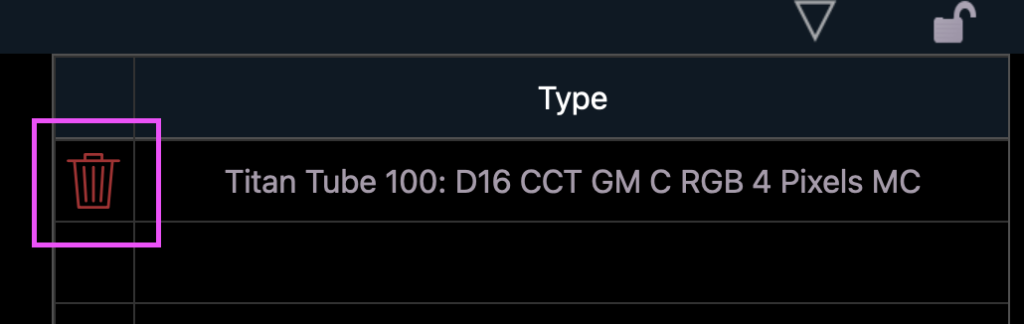
If you have other Astera products, go back to Encoder Maps, copy the first map to map 2, then select S2 for Map to Fixture. Press the garbage can on the right next to your first fixture and select your next one from the CIA.
That’s all there is to this exercise. Hopefully it will help you, and thanks for providing me a motivation to finally do it for myself. Happy Programming.