(Why Should you Care? – Skip this if you want to jump to instruction)
Common workflow is for your electrician to create a patch file, while you have a previs show file with a bunch of cues. To put these file together, you want to Merge. Merging allows you to combine files so you don’t lose or redo work. Since there are two approaches to Merge- Simple and Advanced, we’ll start with Simple. What’s the difference? In Simple, you are bringing in entire categories of information like Patch, Cues, Presets, Macros, Effects, etc. In Advanced, you can select just a few of any category (Effects 1 thru 10), and you can even decide to assign a different number if the host file is using the same numbering (Target of Effect 11 thru 20). It’s a powerful tool with many uses.
(What Does That Mean? “Merge”)
Merging is taking Show File A and combining things from Show File B into it. Notice the order of that sentence, it’s deliberate. You are IN Show File A, and you Merge data from Show File B INTO Show File A. It’s a function that starts in the Central Information Area file menu. When you look below Save, Save As and Open- you notice Merge.
(Get to the Tutorial Already! Instruction starts here)
In our example, I will use a Venue Show File that I want to import my template into. In this example (and these details are important for understanding the process), I am importing into a show file with no color palettes, nothing I wish to keep other than a patch.
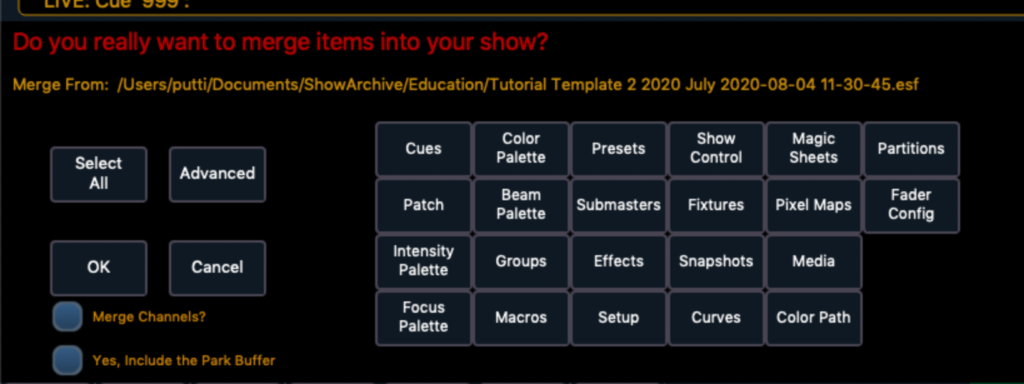
Step one, open the Venue Show File. Remember that you want to start in the file you want to bring things into. In theory, you could start with either file, but I tend to start in the House file. Go to File>Merge and choose your template file. You will see this dialogue box open up:

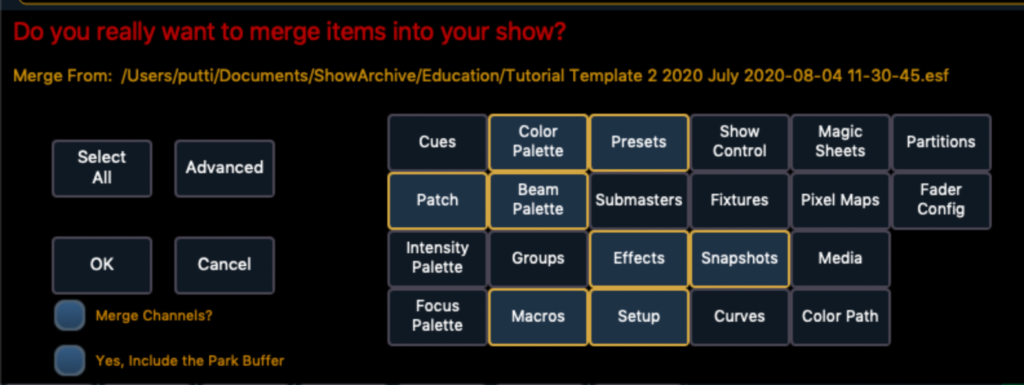
This is an OPT-IN process. By default, nothing will be merged in without you selecting it. Another thing to understand- the console will overwrite things that are being merged in if there are conflicts. I’m going to choose Color Palettes, Patch (WARNING- your palettes/presets are tied to your fixtures way up in the 9000s, so you must bring these lights in for your palettes to work!), Presets (these are tied to our Highlight/Lowlight and Home setup preferences), Beam Palettes (also tied to our 9000s fixtures), Effects, Setup, and Snapshots.

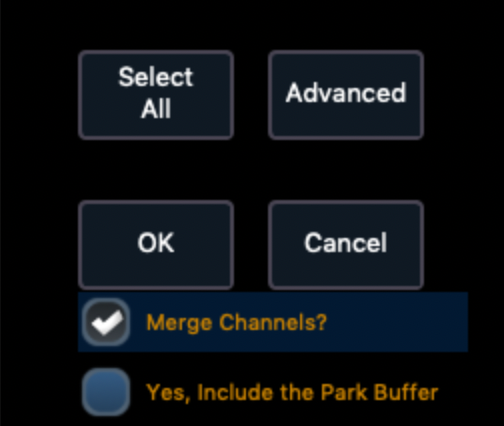
VERY important- we also want to tick Merge Channels? Merge channels does a lot for us- it minimizes the chance we will erase something, it will add our new fixtures in the 9000s so they co-exist with the house patch, and when/if there are overlapping palettes, it will even merge those instead of choose one over the other.

Now, click OK then do nothing else before you verify your merge. Make sure your 9000s reference fixtures are there, check your palettes and presets, your macros, effects, etc. I have made the huge mistake of rushing through this part- and when you are less experienced with Merging, you should take your time for the first several times.
When you have verified, it’s time to Save As. Done. This is simple merge. If you remember that what you are merging in will replace what is in the current show file, remember that referenced data will be lost if you don’t bring in the fixtures you have the data tied to, remember to use Merge Channels and check your work- this is a stress-free, awesome way to get a lot of work done. If you have question or thoughts- comment below.