(Why Should you Care? – Skip this if you want to jump to instruction)
So much of the job of programming/designing is deciding what you want to see right now. Views on the board, actors in place (or out of the way!), and of course- the lights themselves. I’m sure we’ve all had the experience of having too many bright moving lights pointed in one place to pick out which is which. Or needing to touch up one light in a system of gobos and we just can’t see it above the look on stage. Of course, Highlight is one way around this, but there are limits. Normally, Highlight will change your selection to full/open white, but it will also remove gobos, and it won’t do anything about how bright everything else may be. But fortunately, EOS gave us the tools to customize the Highlight/Lowlight look to fit our needs by creating Highlight and Lowlight Presets. They even threw in a great tool called Highlight RemDim. That’s what we are exploring today.
(What Does That Mean? “Highlight/Lowlight/Highlight Remdim”)
Highlight Preset- The ability to create a preset that determines your Highlight behavior.
Lowlight Preset- The ability to create a preset that adds lowlight behavior. When is it used? When you select a group of lights and then hit [Next], the first fixture in selection is now highlighted, leaving the opportunity to give the rest of the fixtures in your group a lowlight behavior. Often a lower intensity level, possibly a saturate color.
Highlight Remdim- Another option tied to Highlight mode that forces lights already on to a lower value you determine. Imagine a busy light look with movers providing a gobo wash. There’s face light and side light and back light on top, making it hard to see the gobos. This function temporarily forces all the fixtures outside of your selection to go to a lower level and it restores levels when you exit Highlight.
(Get to the Tutorial Already! Instruction starts here)
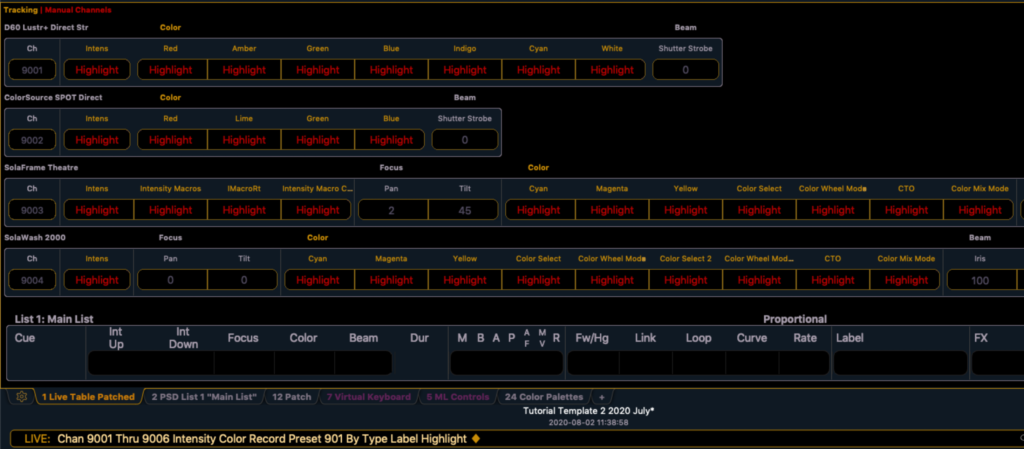
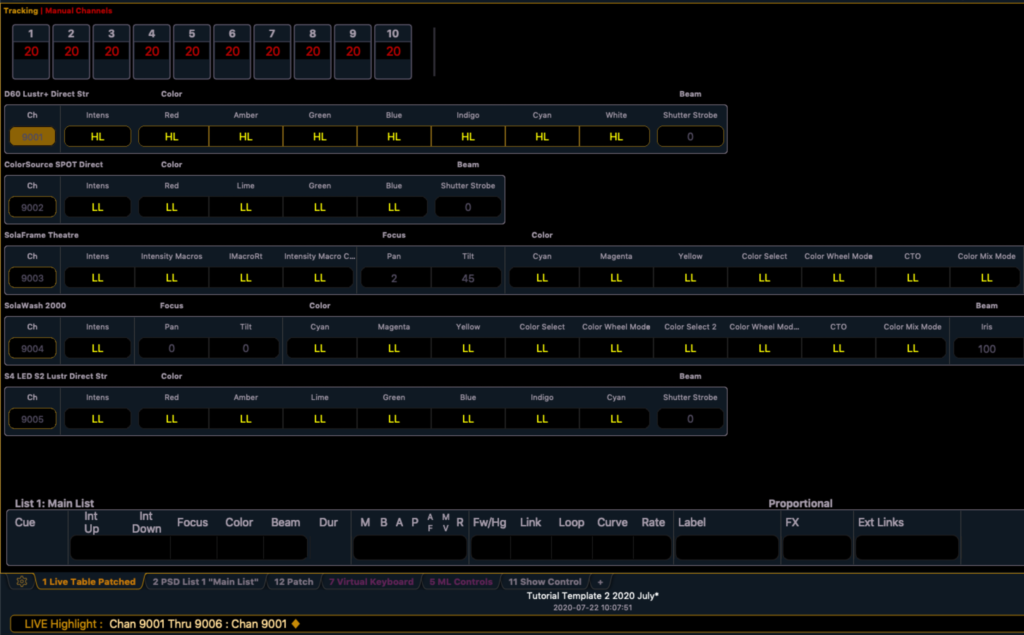
Open your template file. (Don’t have one? Do the Template Tutorial and get started!) First we will make our Highlight Preset. In my template, I have channels 9001-9006. Whatever your reference channels are, select each of them and bring them to full. If they are not already in open white, make them so. Now we want to record the Preset, and as always- we only want to record the information we want. To me, this is only intensity and color. If I have a gobo in when I enter highlight mode, I want it to stay there. Same with zoom, edge, shutters. If you are like me, then you want this one your command line : (Your Channels) {Intensity} {Color} [Record] [Preset] {By Type} 901 [Label] Highlight [Enter}. This specifies the channels, and then filters what parameters you want recorded, then selects the target and labels it. The preset number is arbitrary- I always do 901, but you may select another number out of the way. Take a moment to examine your Live table to make sure only Intensity and Color were recorded for all your fixtures.
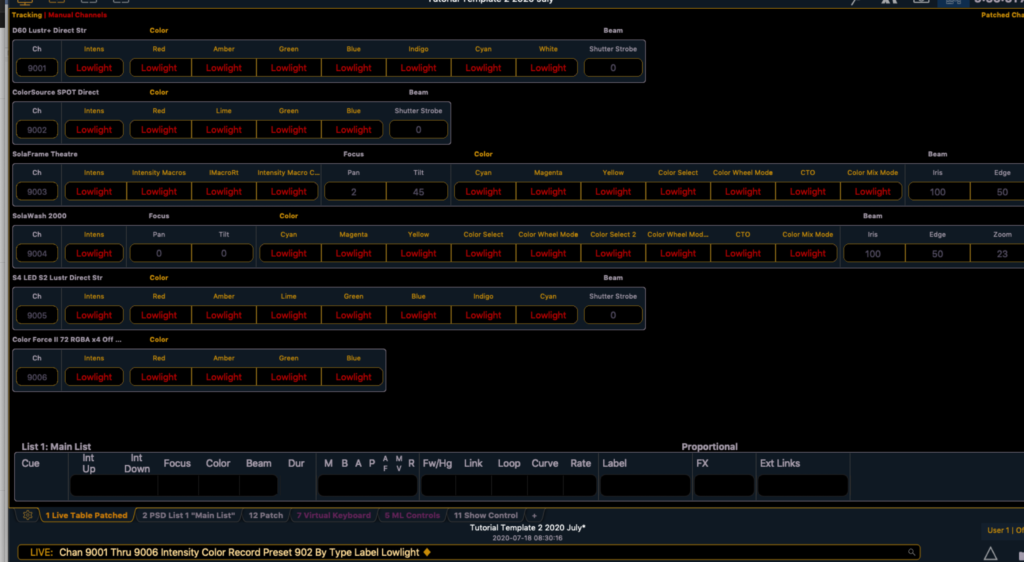
Next we will make the Lowlight Preset. [Clear] [Sneak] [Enter]. [Select Last] [Enter]. Take the intensity to 50, or whatever you prefer. I like my lowlight to put the fixtures into a blue color palette, so I will apply Color Palette 6 from the Mind the Gap Level 4 Complete file I built my template from. Now, we apply the same command line filtering as before. (Your Channels) {Intensity} {Color} [Record] [Preset] {By Type} 902 [Label] Lowlight [Enter}. Once again, check your live table to make sure all of your fixtures have only intensity and color parameters indicated as recorded into your Preset. [Clear] [Sneak] [Enter].
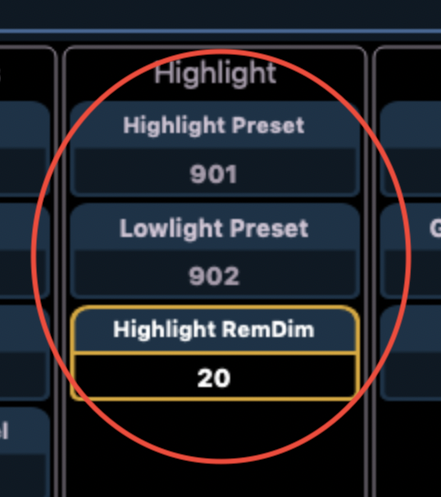
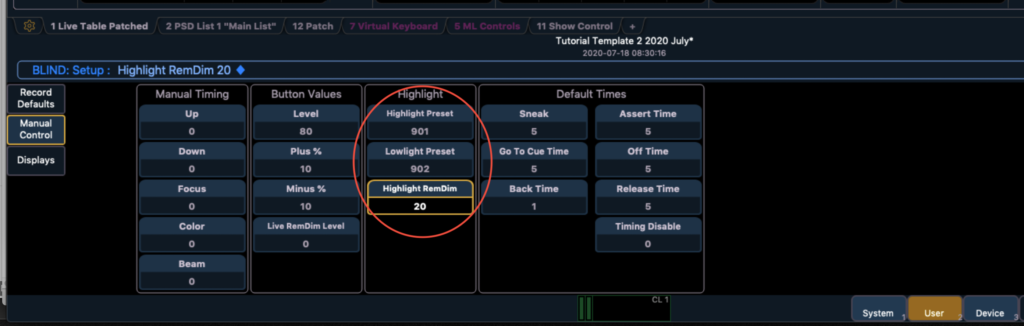
Now we just need to tell the console what we want in Setup>User Settings>Manual Control. Touch where it says Highlight Preset and type 901 [Enter]. Touch where it says Lowlight Preset and type 902 [Enter]. Last- touch where it says Highlight RemDim, and enter 20 (or whatever low intensity value you wish) [Enter}. Go back to [Live}.
Take your fixture to full, put them in a color and if you want to go all the way, through in a gobo and run the edge on your movers. Now, hit [Highlight] [Enter] and [Next] and [Last] your way through your lights. You will see your Highlight and Lowlight presets as you step through individual channels. And because of the Highlight RemDim, any non-selected channels are at 20 percent. (I added channels 1 thru 10 to my file and brought them to a value to show this behavior.)
I find this function something I can’t live without that helps me every day I program. Hopefully, you will enjoy it as well. Exit Highlight mode by pressing [Highlight] again. [Clear] [Sneak] [Enter] and [Shift] [Update] to save your work. I will continue to talk about adding and expanding your template in subsequent posts. If you have requests, questions or feedback- comment below.