Continuing our multi-part series walking through the Effects in EOS, this week we will explore the Focus portion of the Effect Engine. Since the point of a focus effect is so clear (move the lights around the stage), it seems like it might be most helpful for me to dig into the controls and modifiers since making the most of a focus effect seems to be about tweaking the effect a little to get your desired result.
We will be starting in Mind the Gap for vis and the EOS Family Learning Series Level 4 Complete show file, both found on the www.etcconnect.com website.
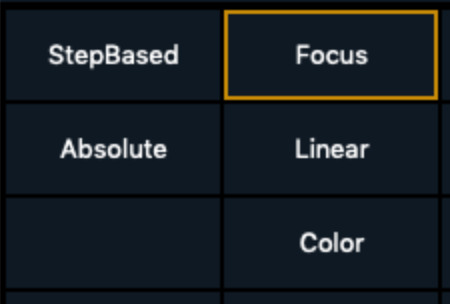
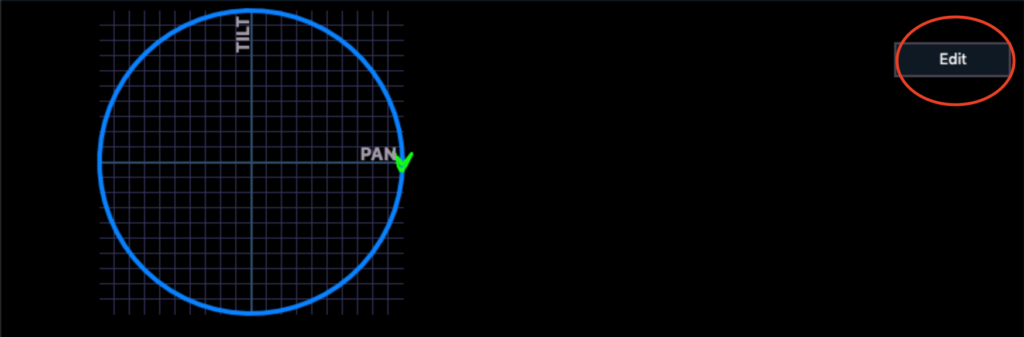
Head to Tab 13 Effects by either opening a new tab or double tapping the [Effect] button. Let’s create a new effect by typing [Effect] 31 [Enter]. Choose Focus for your Effect Type.
When you are done, EOS has created a circle effect for you. Since there is already a circle effect in every show file of EOS, let’s feel free to mess with this one a lot.
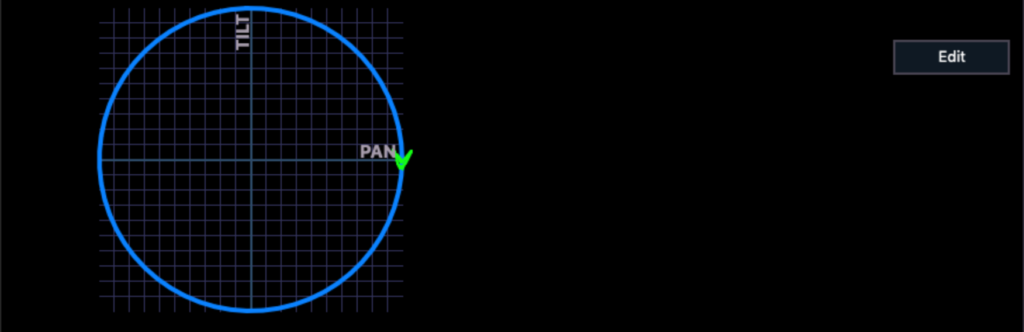
If you don’t already know, you are looking at a wave form. Wave forms always return to themselves. EOS has helpfully shown you on the graph Pan and Tilt to make the effect clear. The green arrow is the starting point of the effect. If we were to apply this effect, it would make a circle around whatever we had the lights pointing at. That point is the center of the crossing of the Pan and Tilt axis. Simple so far. There are two things in this screen you need to understand to get the most out of Focus effects. The first is the green arrow. That means the first thing the lights will do when you apply the effect is head over to the green arrow, then they will do the circle as long as you like. It’s rare that the green arrow as starting point becomes an issue, but it can. Let’s make that happen.
Go to Live, [Group] 5 [Full] [Enter]. [Focus Palette] 2 [Enter]. The FOH movers are now at full and pointed at our CC singer, who I always refer to as Hamilton. Now type [Effect] 31 [Enter] to apply the basic circle effect. So far, so good. The starting point of the circle doesn’t matter much. Let’s go back to Effect Tab 13. Touch the area below where it says Trail.
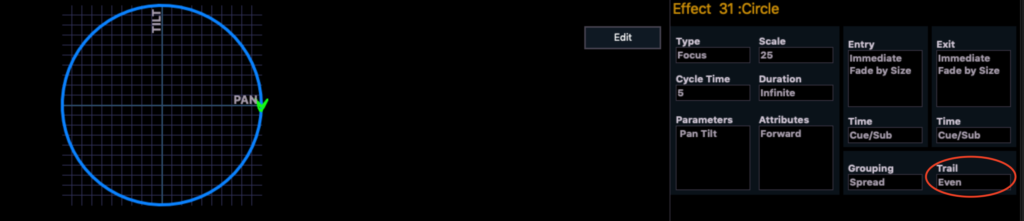
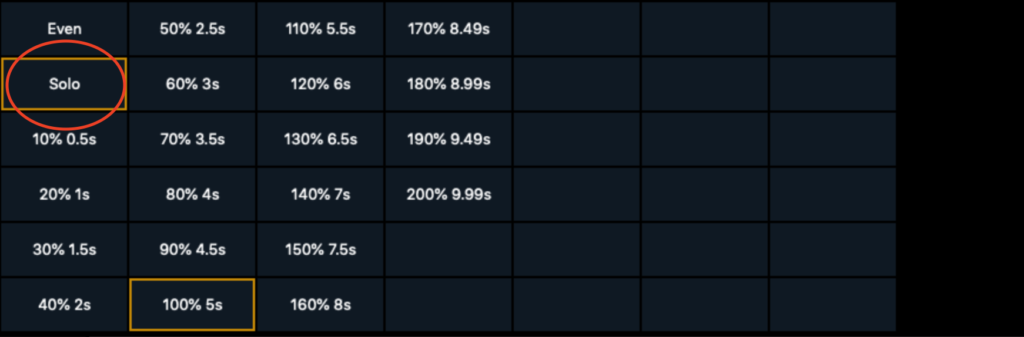
In this next window, choose Solo and press [Enter].
Now go check your vis. Notice the lights are doing their cycle one at a time (this is the meaning of Solo), but notice that all the lights that aren’t moving are sitting far away from Hamilton, pointed where Hamilton is most definitely not standing. Not ideal. I think it would be nice to have a circle effect that goes one at a time, but points at Hamilton when not in motion. We do that by editing the wave form.
Return to Tab 13 Effects. Click Edit in the upper right hand corner of the CIA area. This is the “other thing you need to understand” in this window that I referred to earlier.
When you touch it, you have a new view to take in with many options:
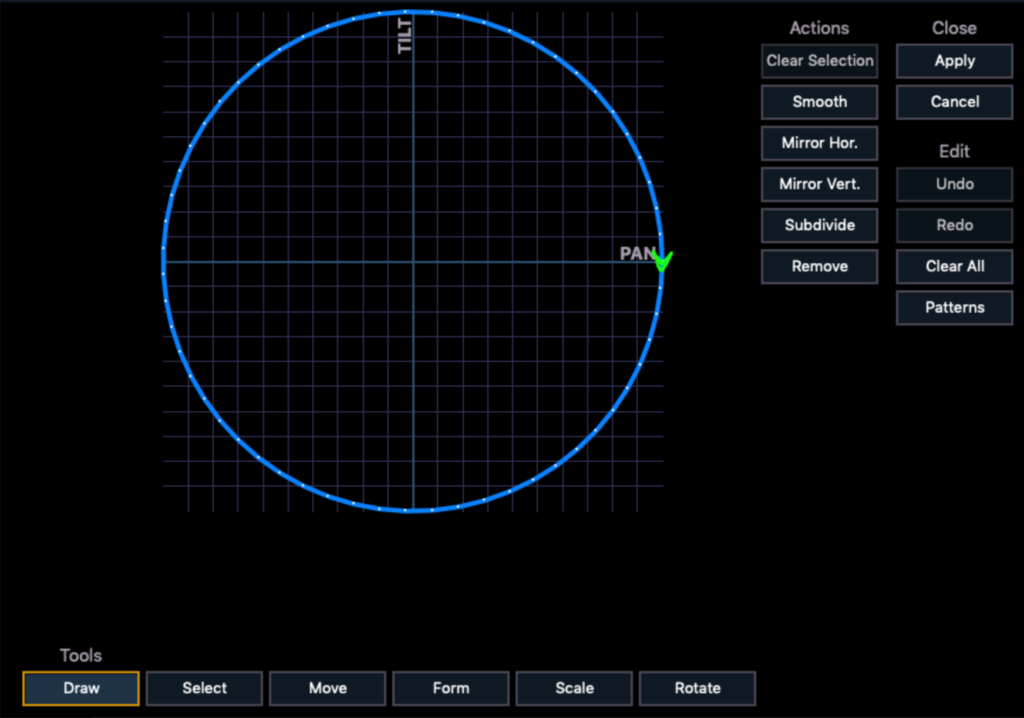
I’d like you to think of this screen in terms of left to right, please.
Tools
- Draw allows you to create your own waveform.
- Select allows you to select a portion or all of a waveform for editing.
- Move allows you to move what you have selected.
- Form allows you to bend or skew your waveform in useful ways- again, based on your selection.
- Scale allows you to shrink or enlarge your wave form while maintaining the shape.
- Rotate allows you to rotate your selection.
Actions
- Clear Selection releases your selection.
- Smooth takes your sometimes awkward forms that you most often draw with your finger and smooth them out. This is best used with a small selection of the wave form at a time.
- Mirror Hor flips your selection from left to right.
- Mirror Vert. flips your selection from top to bottom.
- Subdivide is the opposite of Smooth. It adds points between each point you have selected.
- Remove erases selected points.
Close
- Apply is very important; it’s the only way to not lose all your work! Be sure to hit apply when you are done.
- Cancel closes the window and undoes everything you edited.
Edit
- Undo- undoes your last action.
- Redo- redoes your last undo action.
- Clear All removes all points when you want to draw your own.
- Patterns is a selection of pre-built wave forms. So quite useful stuff in here.
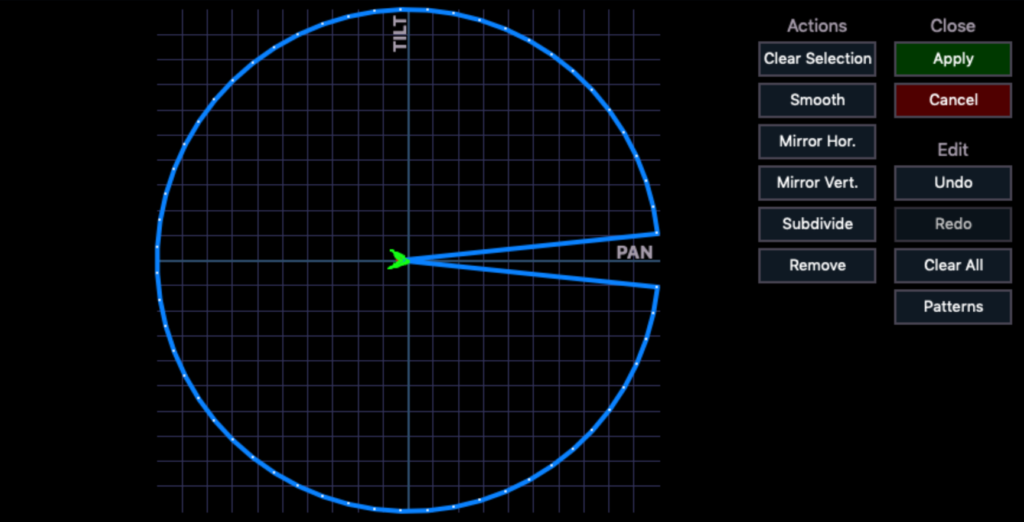
Now that I’ve covered the exposition, let’s do something. You may remember we had an effect running and we wanted to get the effect to stay on Hamilton until they (one by one) made a circle around him. To make this happen, at the bottom press {Select} and then (with your mouse) select just the point that the green arrow is on. Then, click on {Move} at the bottom, and use your mouse to drag the green arrow to the center. The end result should look something like Pac-Man.
When you click the green {Apply} in the upper right hand corner, you will notice a shift on your vis. Now all lights are pointed at Hamilton until they leave to spin around him. Let’s pretend the director wants the effect to head SR first when it begins the circle. No problem. Press {Edit} to return to the Form options. If you press {Mirror Hor.}, the form will flip from left to right. Press apply and check your vis.
But the director still isn’t happy (I’m shocked). The light is going too far onto the cyc. Go back into {Edit}. At the bottom, press {Select} and draw a rectangle to select the top half of the form above Pac-Man’s mouth. Double check that all the points in that area are red to show they are selected, then press {Form} at the bottom. Grab the top half of the form at the top center and start dragging down. Your form should now look like this.
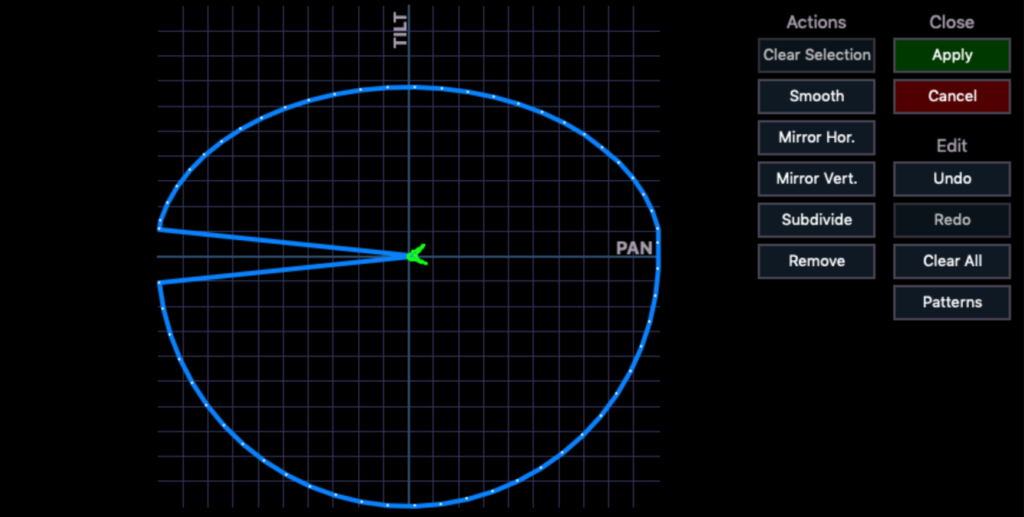
Click apply and check your vis. Much less on the cyc, and he has the chorus standing there, so they are okay with the light just touching that area.
One last tiny thing. Let’s go to Live and release the effect with [Clear] [Sneak] [Enter]. Go back to Tab 13 Effects. Label Effect 31 Pac-Man or something else easy to remember. Now type [Effect] 32 [Enter] and again choose a Focus type for your new effect. Press {Edit}. On the middle right hand side, click {Clear All}. Click on {Patterns}. I’m going to choose this one:
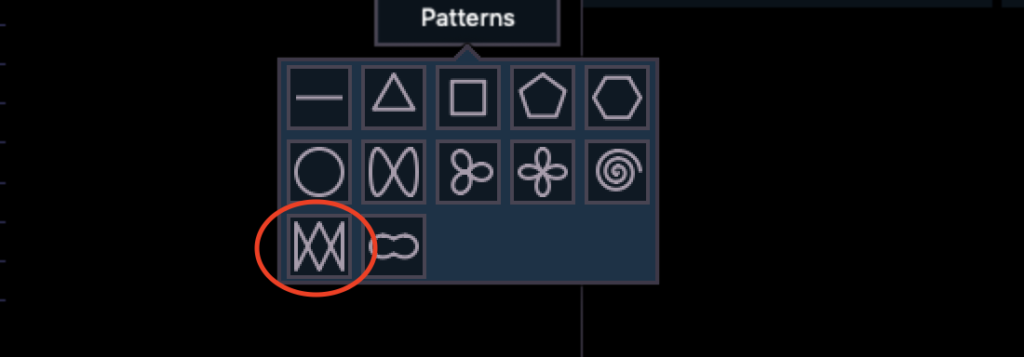
Click {Apply} and go to live. [Group] 5 [Full] [Enter]. [Effect] 32 [Enter]. I like this one quite a bit. If you wish, you can edit the wave form to get it off of the proscenium.
I hope this has helped you understand the tools that are laid out for you in the Focus engine. There are many fun and powerful options for you there. What effects have you seen (or imagined) that you want to create? Comment below.