This week we are going to get into the Hue Saturation part of the effect engine. I feel I need to warn you up front that I don’t find this particular part of the engine very useful. In how I work, I don’t think I’ve ever had much need for something that runs an effect that change both Hue and Saturation. One or the other, absolutely, but not both. But since I like to finish things, I will explain how the engine works, and hopefully you all can educate me on practical applications for it.
As we often do, we will be using Mind the Gap for our vis file and the EOS Family Learning Series Level 4 Complete show file, both found on www.etcconnect.com. Obviously, if you have been following all the effects tutorials in one show file, continue using that one.
Get to tab 13 by opening a new tab or double tapping the [Effect] button. Type [Effect] 51 [Enter] and choose Color for your type.

Once you’ve done that, you have a default circular effect.
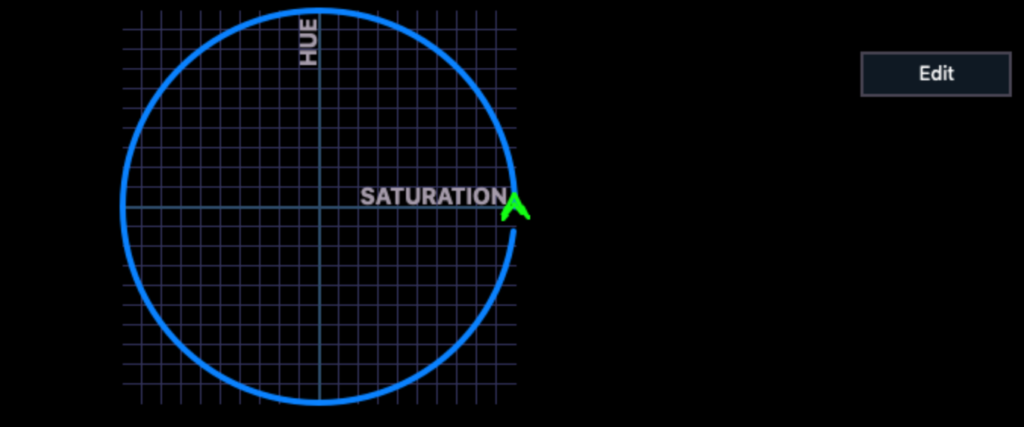
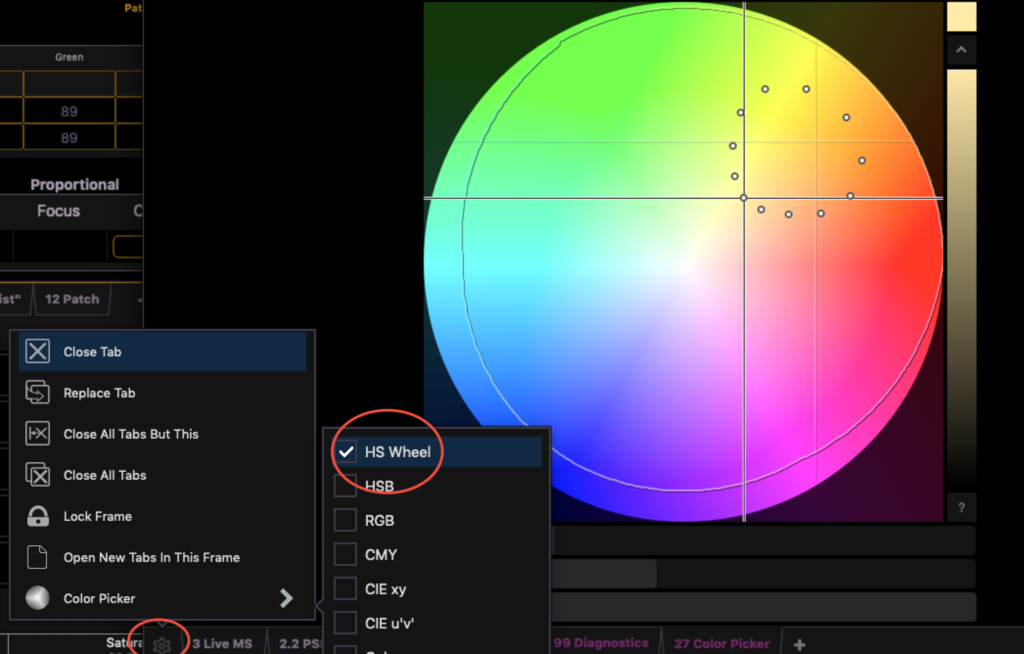
When I’m trying to understand something, I like to isolate and identify. So let’s get our baseline by leaving the default as it is, go to Live and assert the effect. [Group] 20 [Full] [Full]. [Effect] 51 [Enter]. If nothing happens, go to Setup>System Settings and make sure Create Virtual HSB is turned on, and then re-enter the command. Take a look at your vis file and you’ll see a melted sherbet looking effect going on. That’s cool, but to understand how the engine works, I suggest you open a Color Picker tab 27. Since this is a Hue Saturation effect, let’s change the version of the Color Picker we are looking at by touching the cog in the lower left hand corner of the tab with the color picker. Choose the HS Wheel. When you do, you can clearly see how the effect is traveling through the spectrum.
While the stage obviously shows you what the effect is doing, the color picker shows you how. So we see the circle in the effect drawn in the HS view. Why is it small? Because the default scale for this effect is 25. Note that this does not mean 25%, but +/-25 of 360. With lower scale values, these effects can provide effective variations around any color you have chosen in the background. What does that mean?
This part of the effects engine is Relative. That means the effect produces results in relation to what you already have the lights doing. Play with this by clicking around in your color picker to see how choosing a different color changes the effect look. I particularly enjoy the look of the effect when I select a deep magenta for the effect to run in relation to. Your enjoyment may vary.
Let’s go back to Tab 13 Effects. We are going to play with different parameters to see what they do. The first thing we should do is change the scale by touching below {Scale} on the lower right, typing 360 [Enter]. Go back to Live to look at your Color Picker. Since it dropped your selection when you went to Blind, press [Select Last} [Enter] to view the effect running in the color picker. Notice that on the one hand the effect is traveling through the whole color spectrum, but at the same time it is trying to run from fully saturated to fully desaturated. The stage is now kind of a mess with saturated colors traveling across a rather bland off-white cyc The fact the effect operates on both hue and saturation here makes a less than attractive effect. Let’s go back to Tab 13 Effects and change scale back to 25.
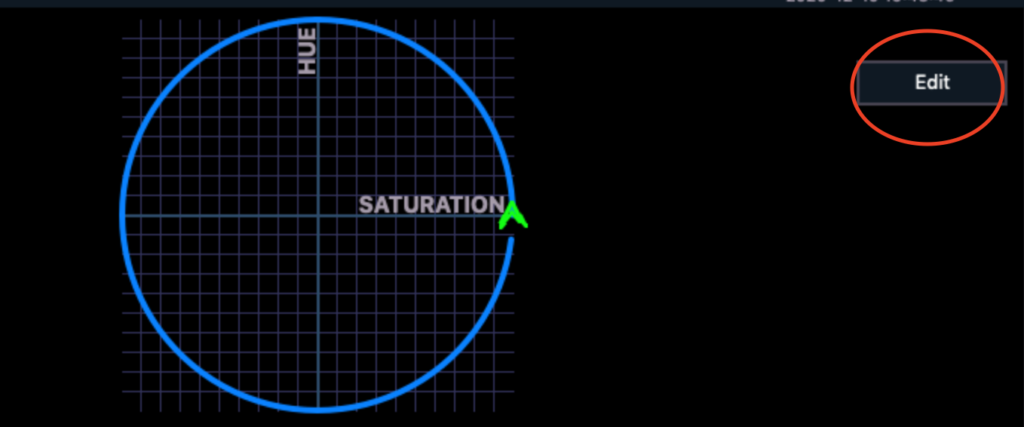
Click Edit on the upper right hand of the window with the circle in it.
Here you see a lot of options and tabs. Let’s go through them.
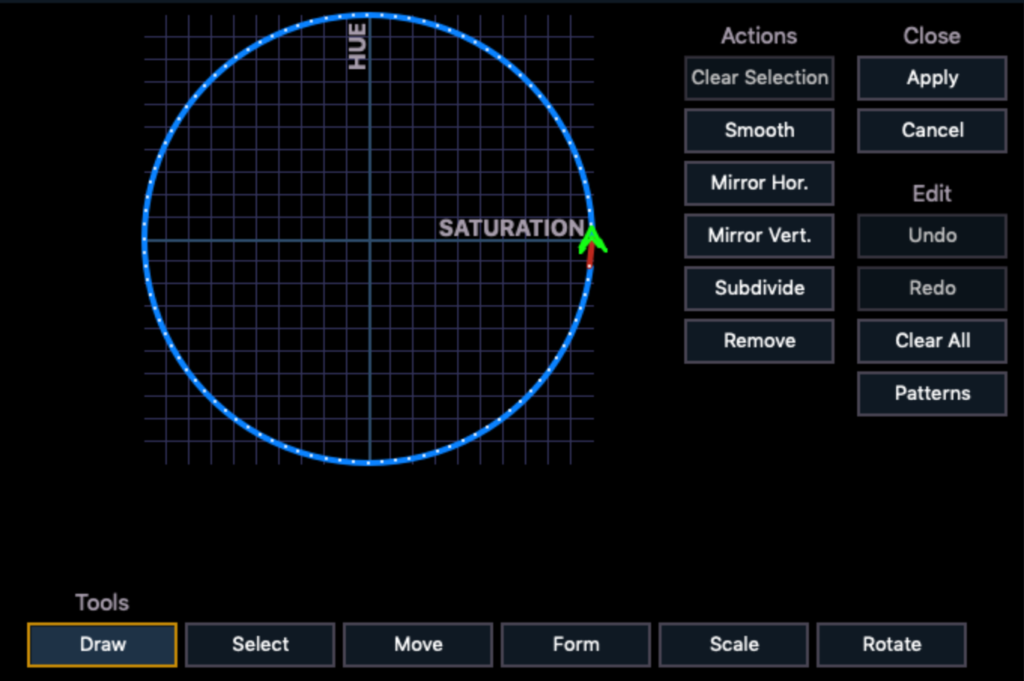
Tools
- Draw allows you to create your own waveform.
- Select allows you to select a portion or all of a waveform for editing.
- Move allows you to move what you have selected.
- Form allows you to bend or skew your waveform in useful ways- again, based on your selection.
- Scale allows you to shrink or enlarge your wave form while maintaining the shape.
- Rotate allows you to rotate your selection.
Actions
- Clear Selection releases your selection.
- Smooth takes your sometimes awkward forms that you most often draw with your finger and smooth them out. This is best used with a small selection of the wave form at a time.
- Mirror Hor. flips your selection from left to right.
- Mirror Vert. flips your selection from top to bottom.
- Subdivide is the opposite of Smooth. It adds points between each point you have selected.
- Remove erases selected points.
Close
- Apply is very important; it’s the only way to not lose all your work! Be sure to hit apply when you are done.
- Cancel closes the window and undoes everything you edited.
Edit
- Undo- undoes your last action.
- Redo- redoes your last undo action.
- Clear All removes all points when you want to draw your own.
- Patterns is a selection of pre-built wave forms.
Let’s continue to isolate and identify. I’d like to isolate the Hue functions from the Saturation for a while. We’ll create a simple new wave to try to identify more of how this effect type works. Click {Clear All} under Edit and then draw a line by clicking once at the top where it says Hue and clicking again at the bottom of the line.
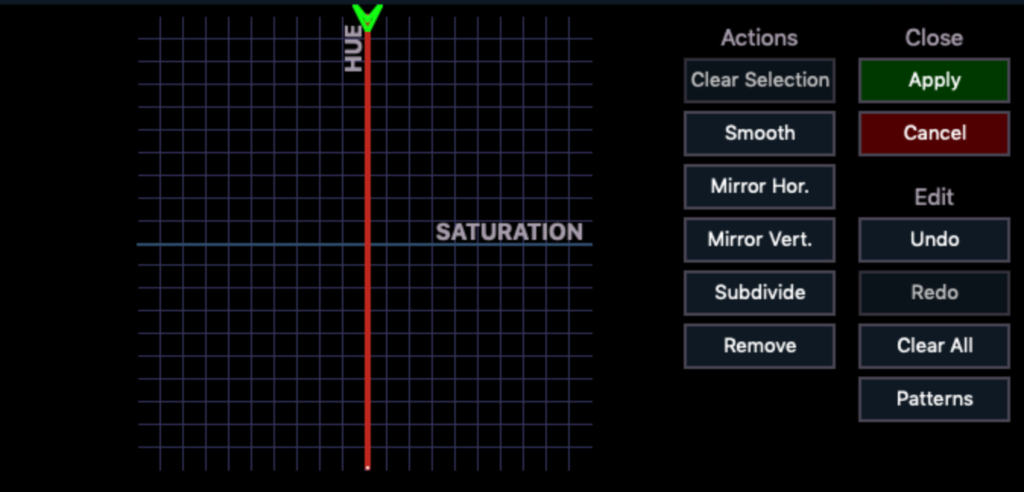
Now click {Apply} to save, go back to Live and type [Group] 20 [Effect] 51 [Enter]. We should have almost the same effect running as before, but now it doesn’t saturate and desaturate. Let’s make this more intense by back to Tab 13 Effects and increasing the Scale to 90. When you go back to Live and [Select All] again, this really drives home that the effect is running plus and minus 90 degrees, since we are now traveling half the color spectrum.
Let’s go back to Tab 13 Effects, click on Edit again and choose Select at the bottom.

Select both points of your line wave form by clicking and dragging over the form. Now select Rotate at the bottom.

When you click on your line, notice your mouse is now a glove and you can spin the line to rotate it 90 degrees.
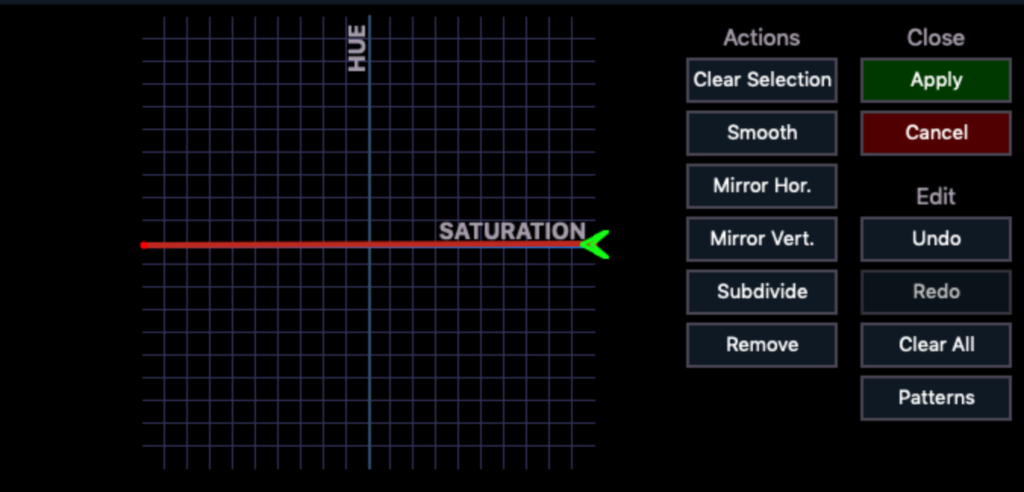
Click Apply and head back to Live. Now our effect is only a Saturation effect, traveling from White to whatever color we have selected. To me, this really helps me understand the relationship between the two elements of the effect, and how the console interprets scale across the two elements.
That’s the end of this tutorial. Hopefully someone with a better imagination out there can come up with a better use-case for this part of the engine. When I ask friends about the Hue Sat effect, they always say “Oh, the Rainbow Effect?” Maybe you’ll be the one to show us all how we’ve been missing opportunities! Comment below.