Last week, I walked through various functions of using About as a modifier. I did that post because I had a show that I needed to set limits on some fixtures so they wouldn’t tilt into themselves, and I needed to see 16 bit values to edit the profile. Since we talked about viewing the 16 bit value part last time, let’s talk about the editing the profile part now.
There are many good reasons to edit a profile. Setting limits in a fixture, like the above example. Sometimes brand-new profiles don’t work as intended, since the profile programmers don’t have access to the fixtures. (I’m looking at you- Elation Monet Profile with your RGB flags set to full!) Sometimes you simply don’t like how the profile was programmed. I’m going to walk you through the tilt issue, since there are many concepts along the way.
The situation- A local theater has Apollo Right Arm products with Colorsource fixtures on them. This is great, except the Right Arm was engineered for the Source 4 standard and the Colorsource is different enough that the fixture will whack the ballast of the Right Arm at full tilt. When I was testing, I found that I could safely use 134 +/- of the 135 +/- degrees of travel. So I opened the profile (Patch>Type>Edit, select the profile from the list on the left), and noticed the values are set in 16 bit.

Pause. What’s 16 bit mean?
Real simple user-definition here: Bits are the travel between zero and full. If something has fewer bits, motion may be choppy. If something has many bits, motion is smooth, but you may spin your encoder for a long time and wonder if anything has changed. The two bit depths that are very close to the lighting industry are 8 bit and 16 bit. 8 bit has a maximum of 256 steps from 0 to 255- because zero is a value. 16 bit has 65536 steps. So you will notice that though tilt is a 16 bit parameter (almost always), users don’t move the encoder and see 0-65535, since we as programmers think in degrees. So this explains why profiles “work” in DMX (absolute) values (0-65535) but display User Values (-135 degrees to 135 degrees).
Back to the Job!
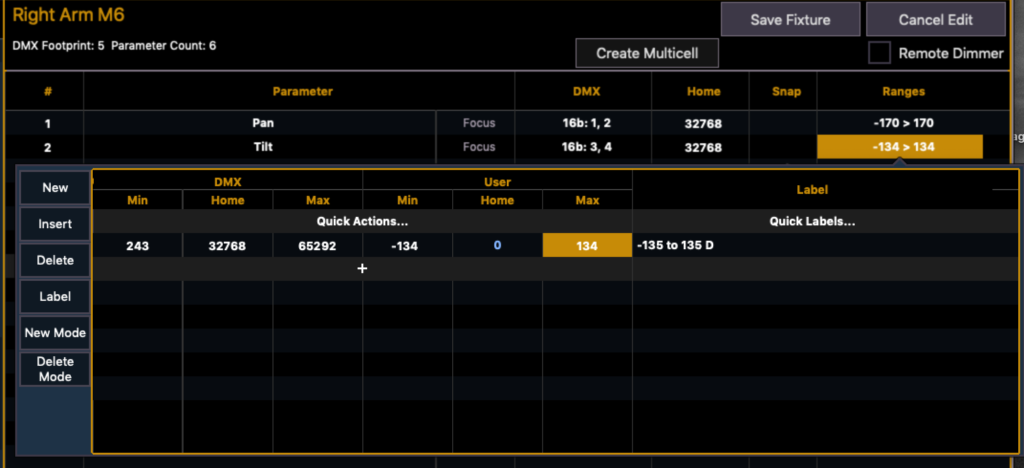
When you want to alter something in a profile, you first pick the line of the attribute (Tilt), and then you usually want to click on the values under Ranges. When I click on the ranges under Tilt for the Right Arm- this is what I see:
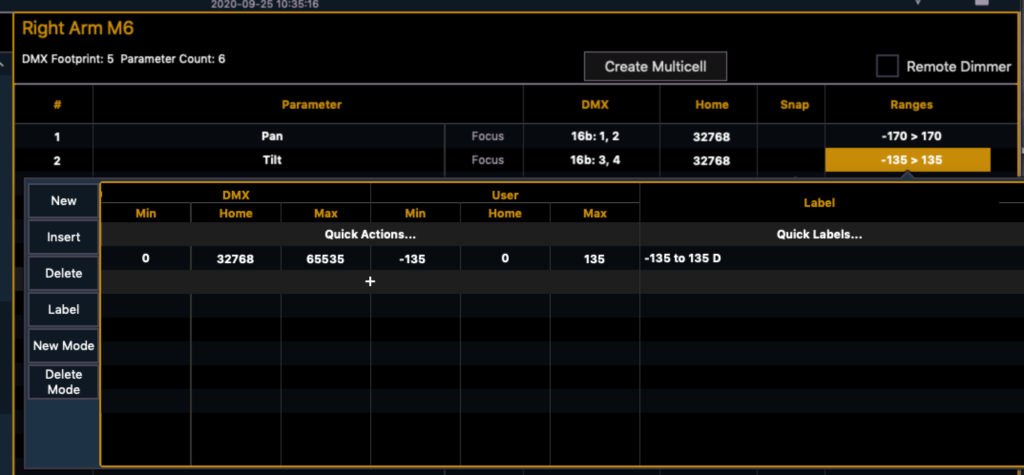
Notice the first set of values are 16 bit values, under the section DMX Min and Max, while on the right, the values are expressed in Degrees under User. We need to edit the DMX values to prevent the fixture from going too far in either direction. We will also edit the User values to make them more accurate in what they are telling us. So we need to find out the 16 bit value when the fixtures is tilted in either direction just before it hits. Let’s jump back to Live.
I take the tilt value to 134, since that’s right before it hits itself. Press About and Live, and you will bypass the user values (-135 to 135) and you will view the 16 bit values. Seen here.
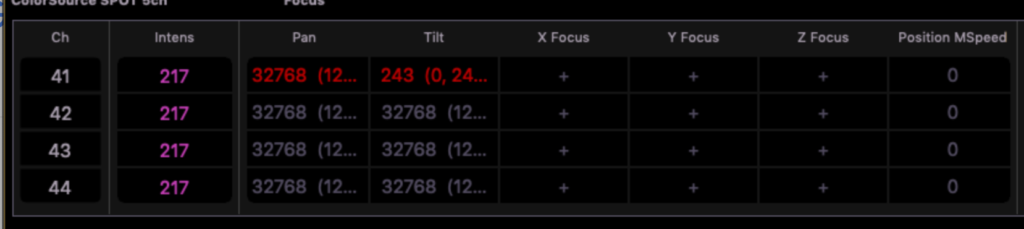
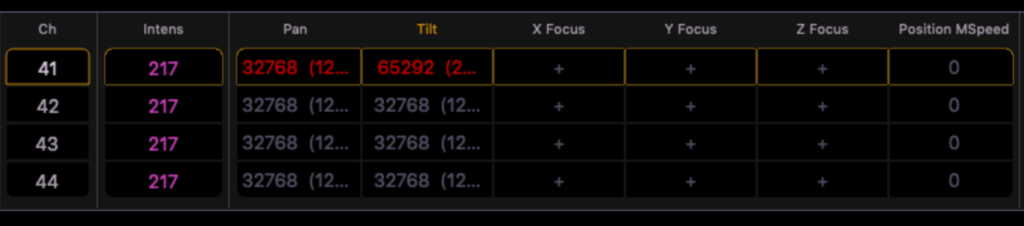
So I can see the minimum value should be 243. When I take tilt to -134, the value is 65292.
Let’s [Sneak] [Enter] and go back to Patch>Type>Edit, Right Arm. When we again click on the Ranges cell under Tilt, it’s clear we need to change the minimum and maximum DMX Tilt values. Minimum, 243, Maximum, 65292. Just click where it says the original value to edit. The profile should now look like this:
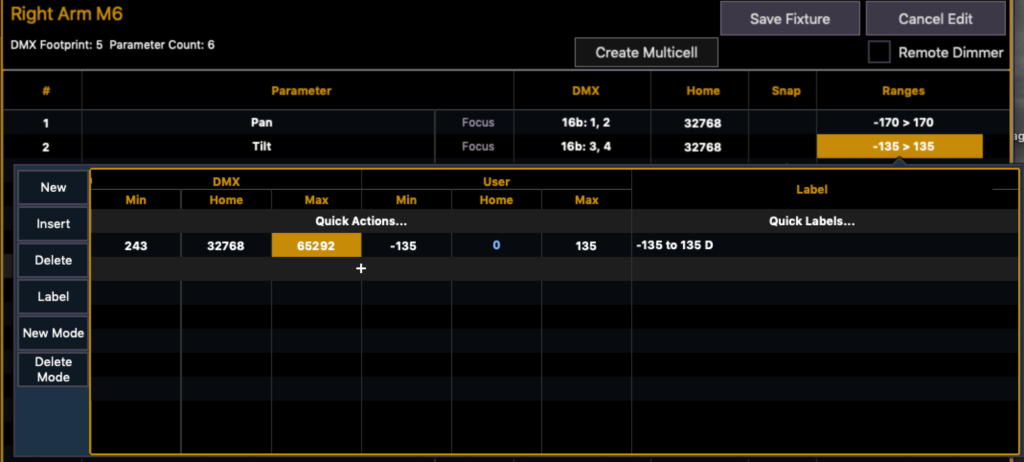
Next let’s edit the User ranges to -134 and 134.
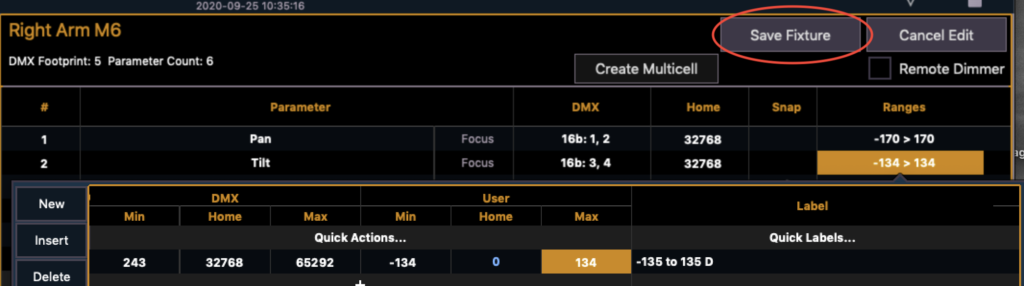
Now- VERY IMPORTANT- you need to click Save Fixture at the right upper-mid of the screen to save your work.
That’s it. The fixture doesn’t whack itself in the head any more. Now, hopefully what you learned in this process will be useful to you as you edit your own profiles to suit the needs of your work flow or production. Do you have favorite profile editing examples? Comment below!