I’m a big fan of labeling, as I’ve mentioned many times in the past. Labeling your cue stack can make it so you never have to refer to your script again, and can be very handy for knowing how far to track something, or if someone calls for a cue out of sequence. If you are away from the desk, or not your own programmer, you can take advantage of the Lightwright OSC functions to label cues and create scenes. (If you don’t already know- scenes are a great organizational tool that sets visual brackets above and below your specified range of cues like “Scene 1” or “Song 3”. These then become GoTo cue destinations, or Update Thru “Scene 7” targets. Very handy if you aren’t already using them.)
If you need help getting Lightwright and EOS communicating, check out this blog first.
With both EOS and Lightwright linked, go to Utilities>Get All Cue Lists and Cues from Console.
Depending on how many lists and how many cues, this can take some time. (You will see a red triangle rotate in the Console Link icon in the upper right hand corner of Lightwright.) When complete, go to Utilities>Open existing cue list. Lightwright will show you your cue list. Though I try to label everything, in the heat of tech I sometimes miss things, and cue 14 is jumping out at me. Fixing it is incredibly easy. Simply double click where the label should be and enter your label.
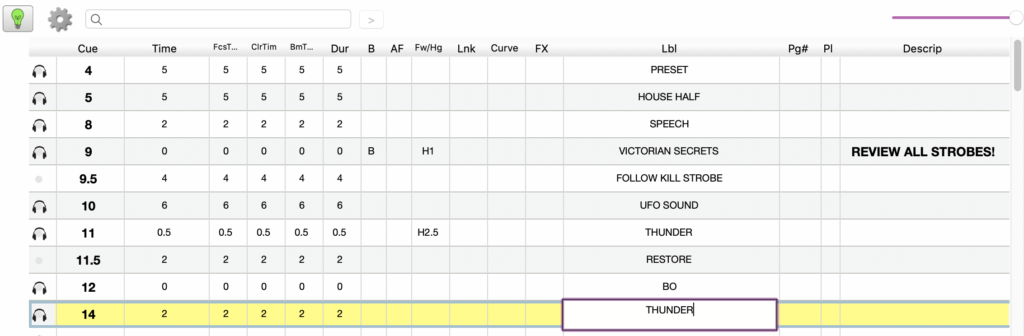
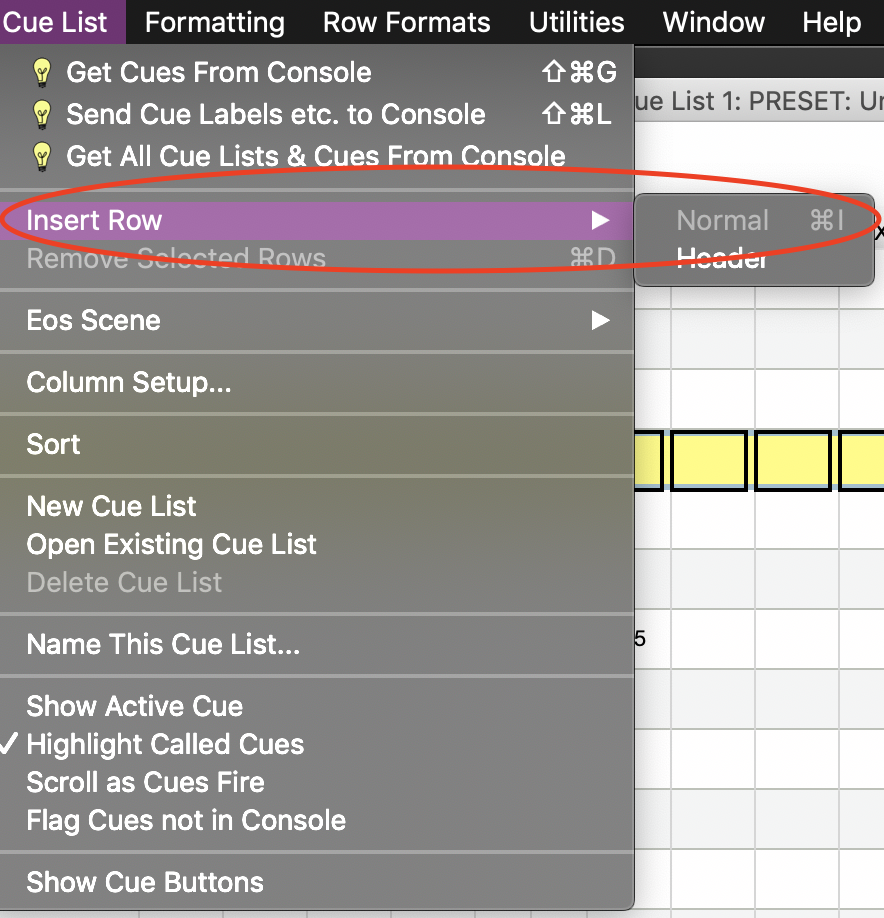
I’d also like to create a scene for this first piece for the reasons I mentioned above, so first step is to select the first cue, which for me is Cue 9. Select it by poking the headphones icon (I don’t know why the headphones are there). We need to insert a header first. Windows users have a keyboard shortcut available, but Mac users have to go to Cue List>Insert Row>Header.
Now you need to turn it into a Scene by clicking on the dot (where the headphones used to be but now aren’t) and then going to Cue List>EOS Scene>Set or by clicking Command T for Mac users, and I believe Control T for Windows users.
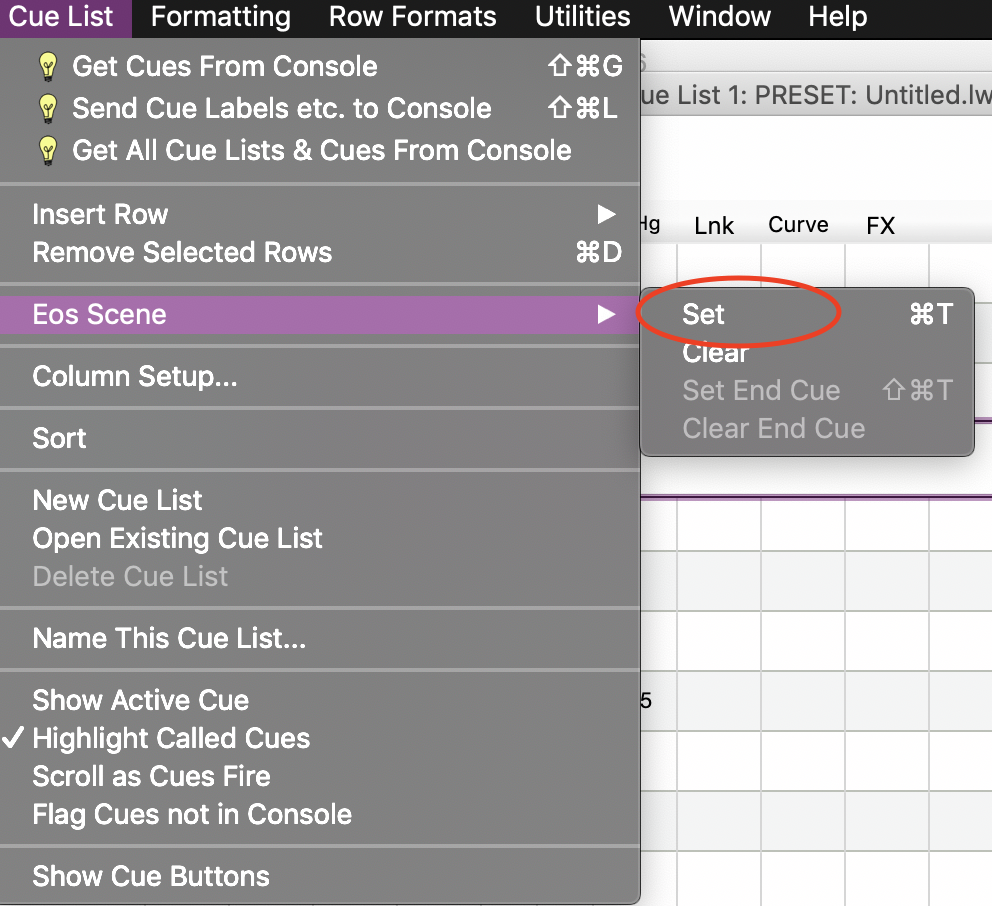
The Header now turns Teal and is a Scene ready to be titled. This dance piece is Victorian Secrets, so that’s what I’m typing.

Just like in the console, you need to now declare a cue to be the end of the Scene. Scroll in the cue list to the cue, select it by clicking the headphone icon and go to Cue List>EOS Scene>Set End Cue.
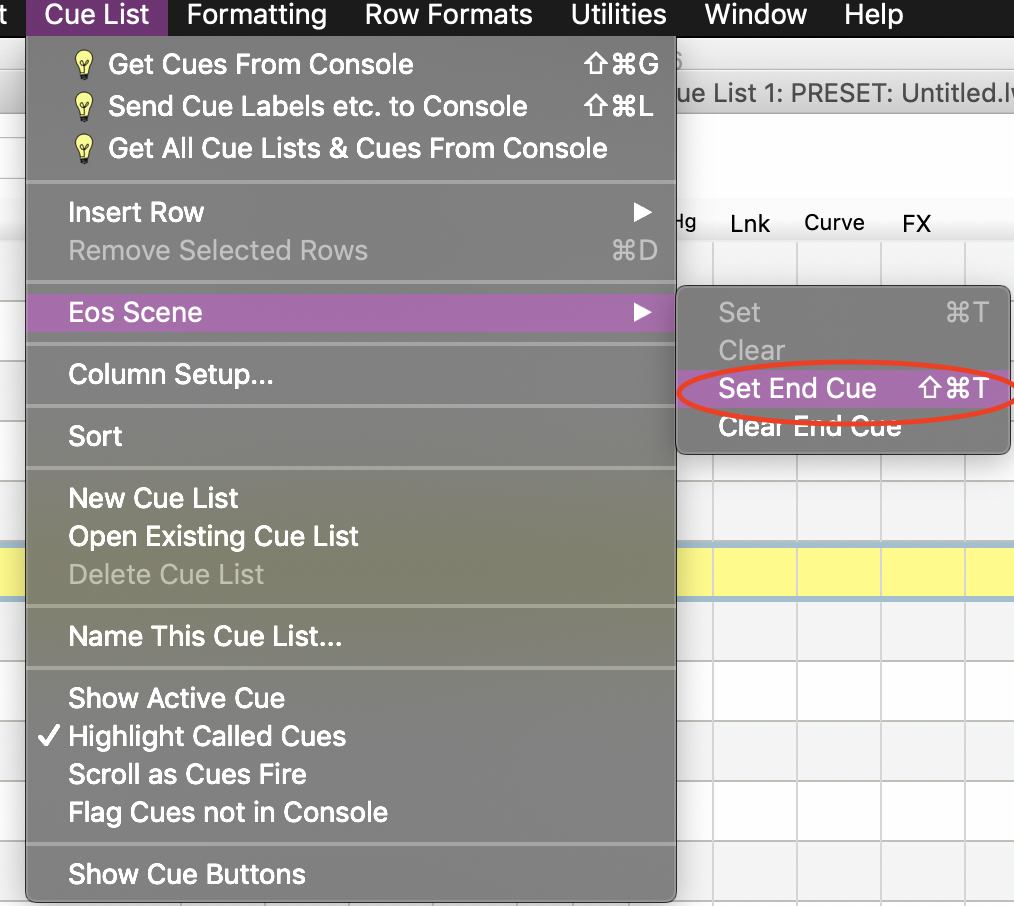
Though it is hard to see when selected, there will now be a teal line under the cue, indicating the end of the scene.
One might think you were done, but no. You still need to push the changes to the console. As is appropriate, you need to choose a moment (such as not during a paid preview) to push this info to the desk. Full disclosure- I’ve totally pushed these updates to a console during a paid preview, but it’s not something I can advise in good conscience.
To push the data to the console, go to Cue List>Send Cue Labels etc to Console. Please note that it seems if you are on Nomad that you may need to be on Previs mode or signed in as Primary for this to work.

That’s it. A fast and efficient way to get more useful data into your show file. If you have questions, don’t hesitate to ask. If you have requests for future topics for me to post on, comment below or send me an email through my contact me form.