In my nerdy opinion, the big challenge of bringing moving lights into a console was where to put that much added information. Console designers expanded into a layer-based approach to programming with many separate windows/tabs within the console to allow you to look at exactly what you need. You often need to view several different tabs at the same time, based on your task. There is no singular view that will get you through a show, there is only the view that is important right now. In EOS- that is why there are Snapshots.
What does that mean? Snapshots
Snapshots in the simplest form are visual recordings of your screen layout- either one screen, multiple screens, or all screens, depending on how you record them. Snapshots can recall views on other users systems (great for managing a designer’s needs). But there’s a lot more to them. It not only records what is open and active in your views- it records what is in the background as well. Meaning- if you add a tab, then recall a snapshot- that tab is no longer there. They can also record and recall more things like filter states, what encoder page you are on, what fader page you are on, what view is tagged as Favorite (that’s what that star next to views in the CIA area does, BTW), and it can even recall an exact Direct Select configuration. They are VERY powerful things and can make your programming day fly by efficiently if used well.
Get to the Tutorial Already
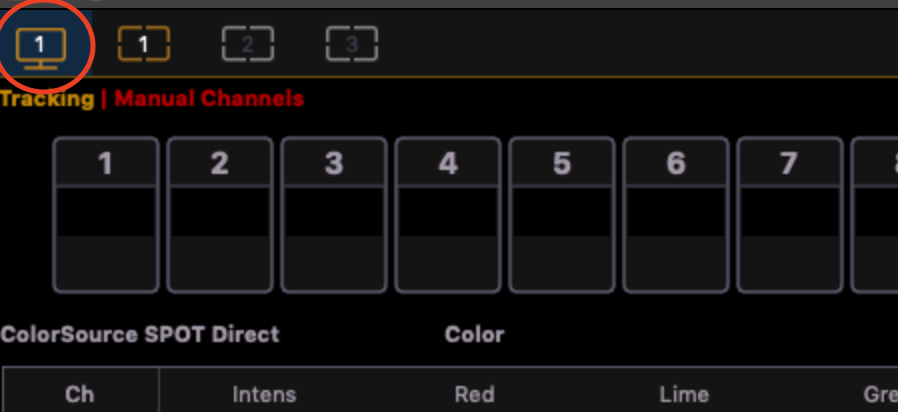
Let’s start simply. Set up a split screen to show your live table on one half and the PSD (cuelist) on the other half. Touch the monitor icon in the upper left hand corner to split the screen.
I prefer the side by side split screen- but you do you.
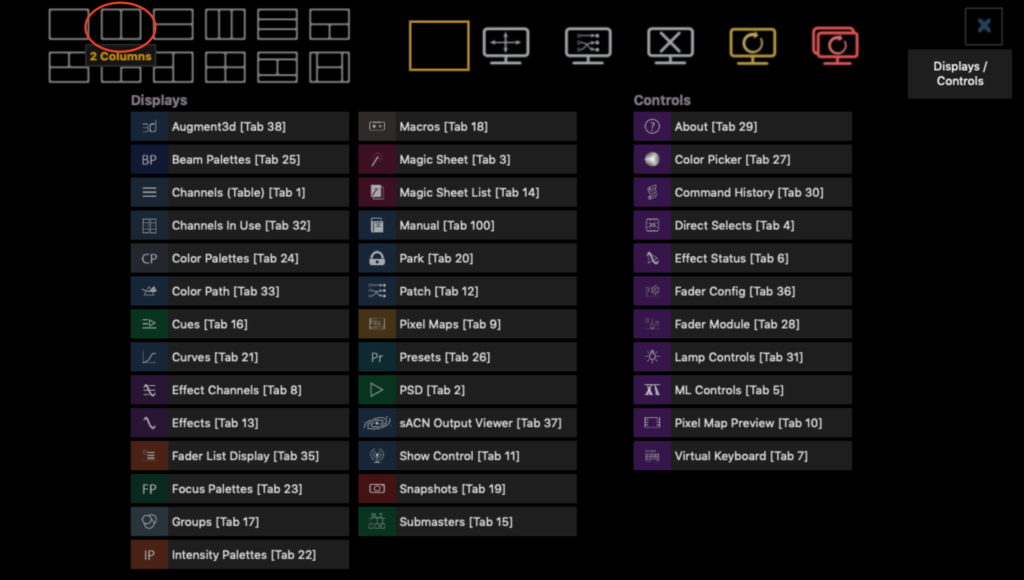
Now click the + symbol on the new half of your split screen to select what to put there.
Select PSD (Cuelist).
We are going to record a snapshot. Snapshot is Softkey 1 and it shows up after you press [Record]. So your command line should be [Record] {Snapshot} 1 [Enter].
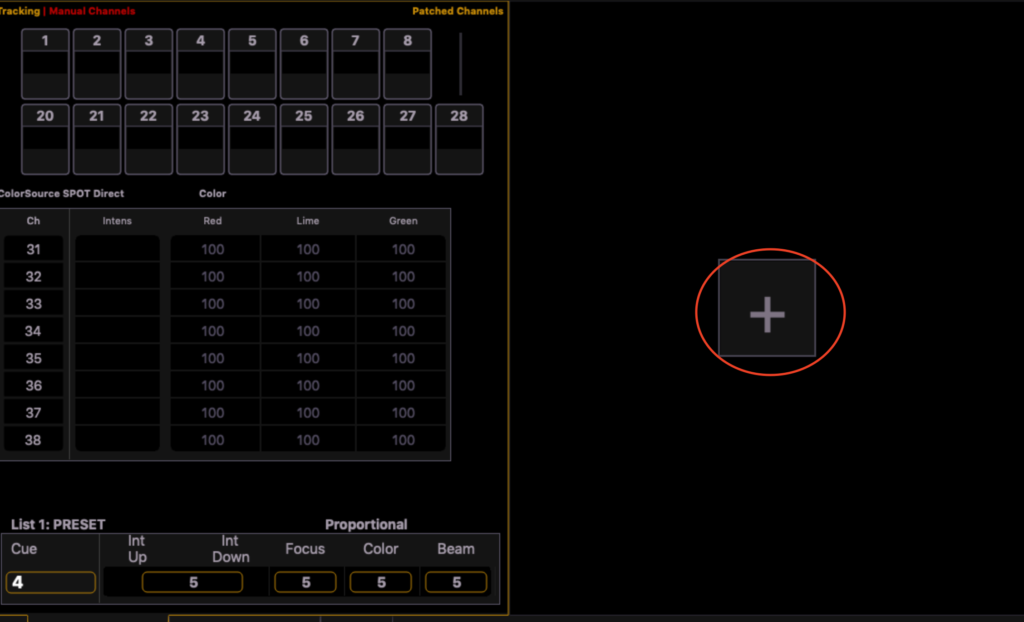
Now let’s create another view. Replace the PSD (cuelist) by right clicking on the tab label or clicking the cog in the lower left hand of the PSD tab and selecting Replace Tab.
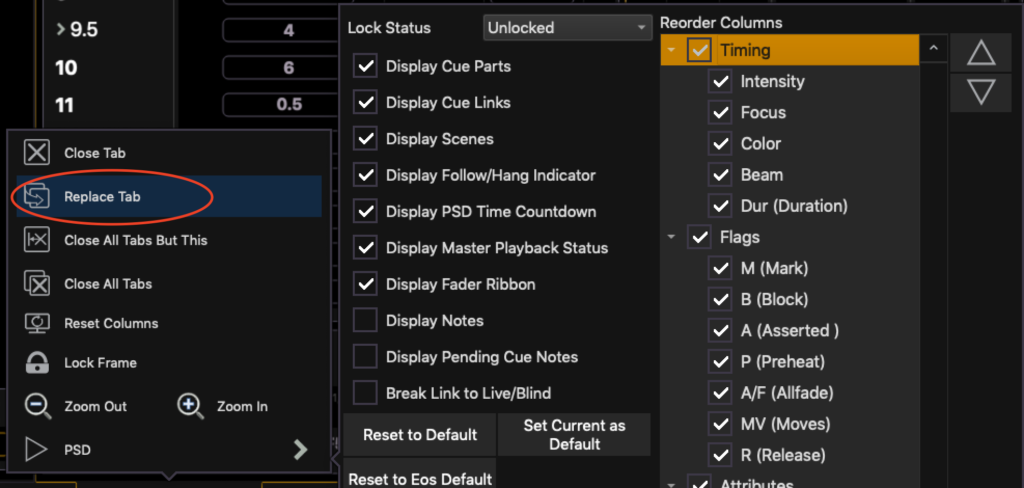
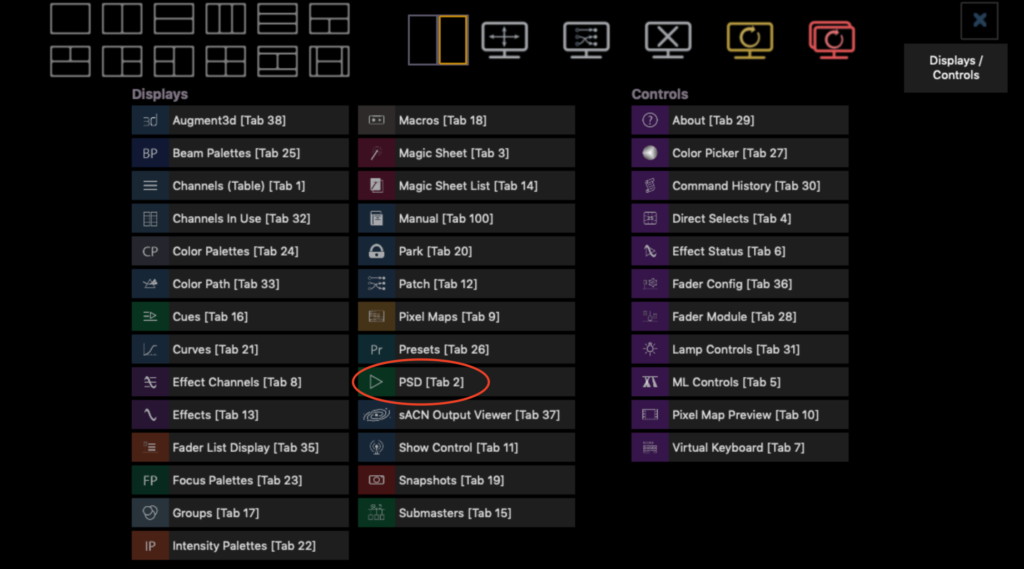
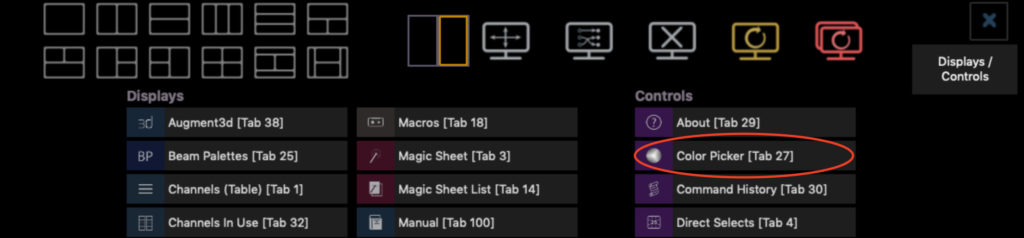
Choose a color picker (or again- choose something you would like to see). Color picker is in the purple Controls area, second from top.
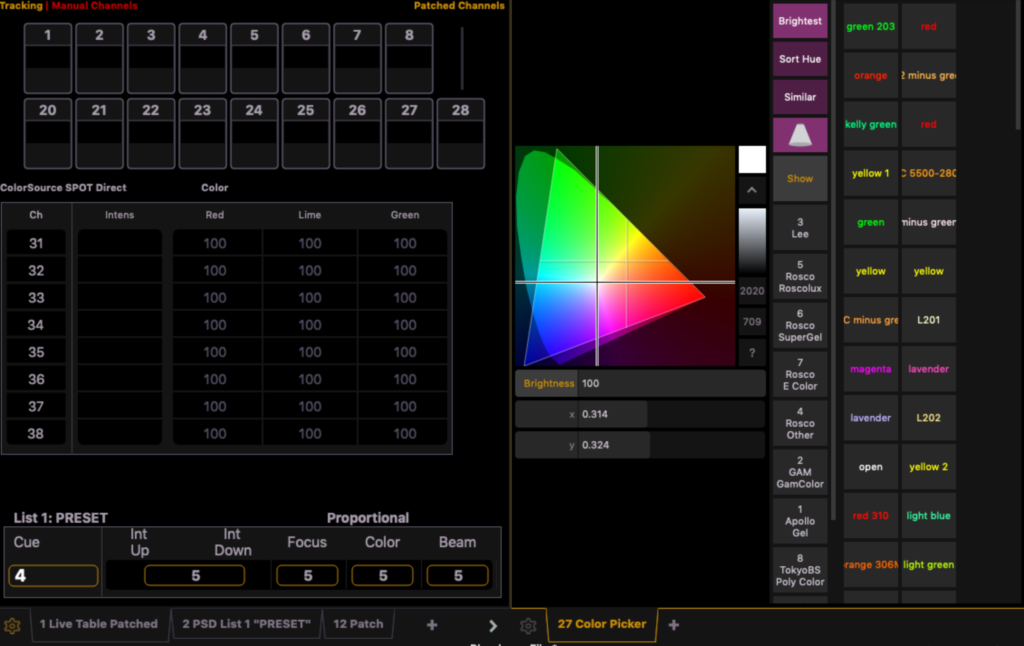
Your screen should look like this.
[Record] {Snapshot} 2 [Enter]. Now it’s time to recall these views. There are a few options. First- you see the camera at the top right of your screen? If you press that, all of your snapshots will appear.
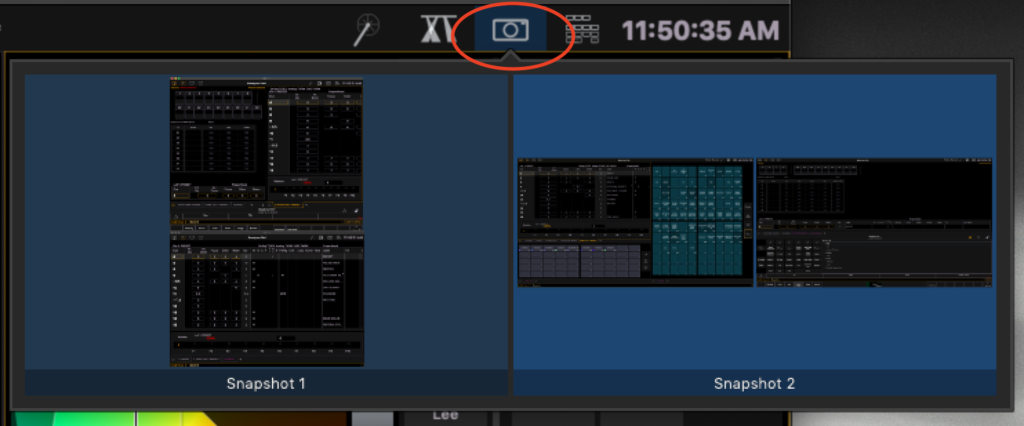
Touch Snapshot 1, and you will go back to your first view.
Other options are to set up a direct select with snapshots, write a macro, or write macros and assign them to X-keys (my personal favorite). You want your snapshots very quick to recall on busy shows- too many steps take too much time.
Alright- those were simple, so let’s do one more thing a little more challenging. In other blogs, I’ve discussed filtering and why it’s important- especially in Beam Palettes to only record the data you want. What if you could recall filter states on the fly and the placement of the encoders to be ready to adjust the parameter you need? You can.
First- we want to adjust our Snapshots to include encoders and Filters. So, since we are in Sanpshot 1, let’s type [Record] {Snapshot} 1 and don’t press enter! We want to select Encoders and Filters now, then press [Enter] twice.
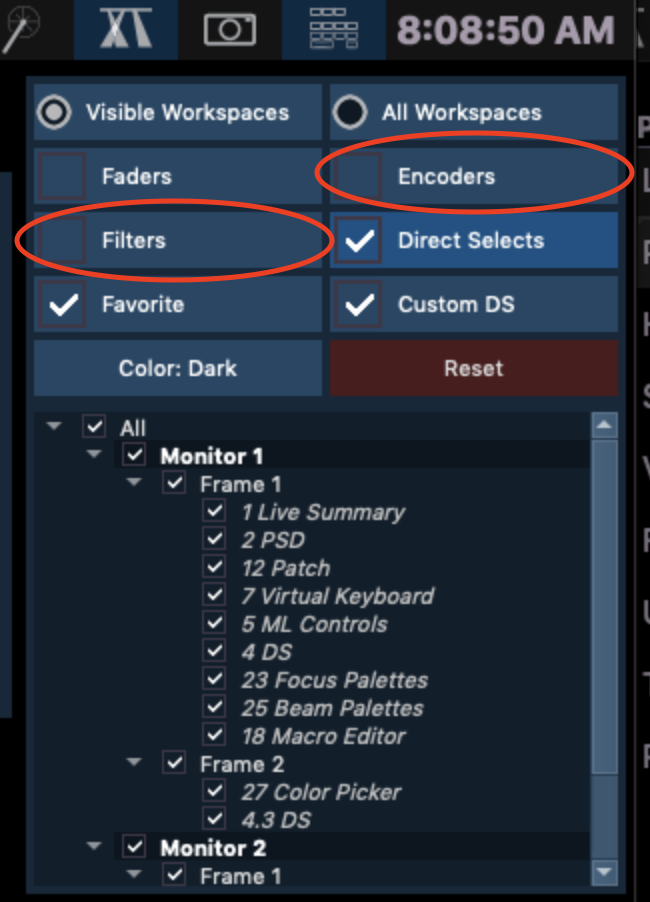
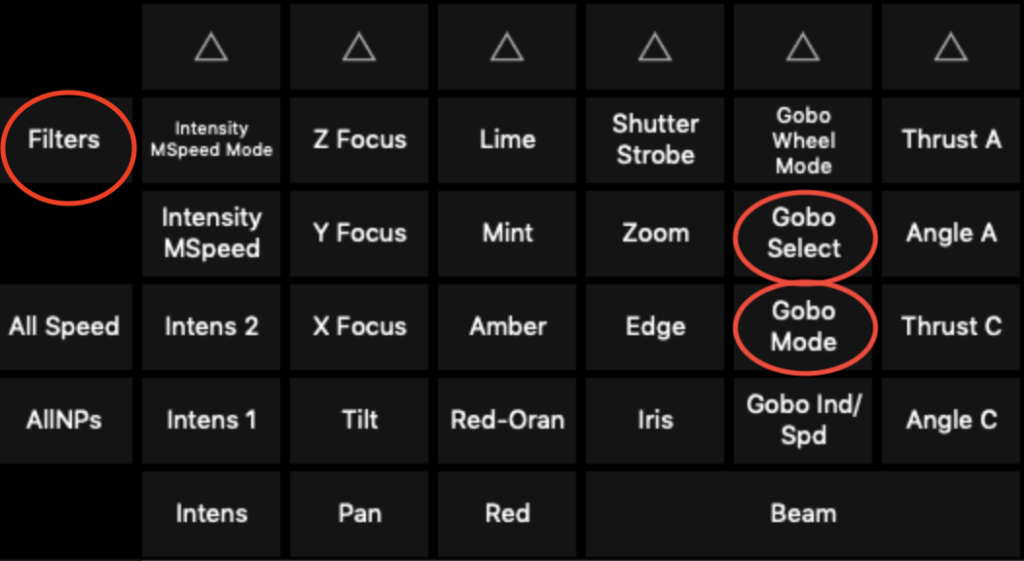
Now we will start making our new Snapshot. We will create a filter state just for Gobo Select and Gobo Wheel Mode and set our encoders to be set for us to alter the gobo and record it into a Snapshot. In your CIA area, you should see your parameter tiles. If you don’t- press [Displays] once. In the lower left hand corner, press Filter. Then press Gobo Wheel Mode and Gobo Select. Press Filter again to close the filter state.
Note that many things in your Live table have N next to them. That N for Null- meaning you can’t record those parameters. At the moment, you can only record Gobo Select and Gobo Wheel Mode. This is the entire point of filtering. You can still control all the parameters with Ns next to them- but you cannot record them. Cool, huh?
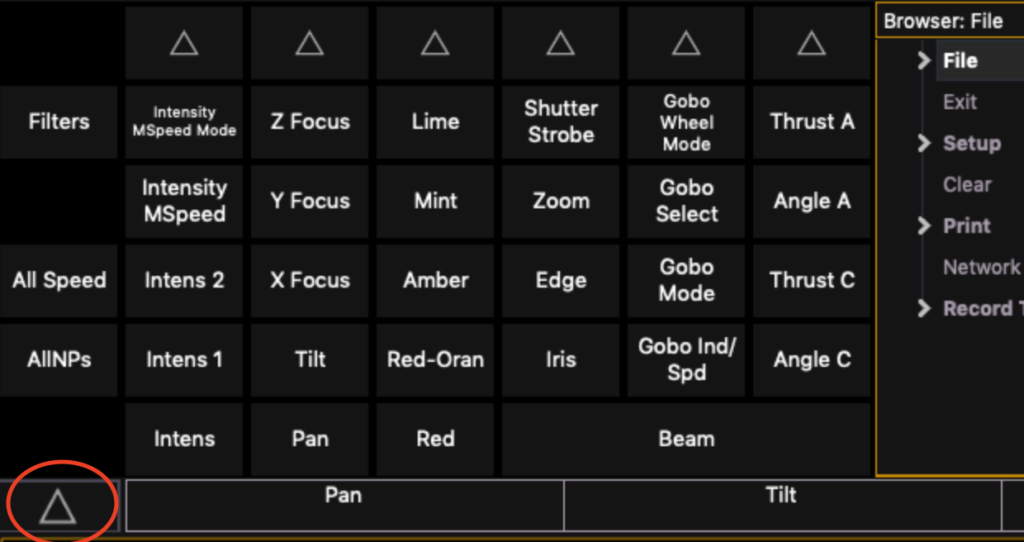
Next we will press the arrow in the lower left corner of the CIA, which will open the Encoder Display.
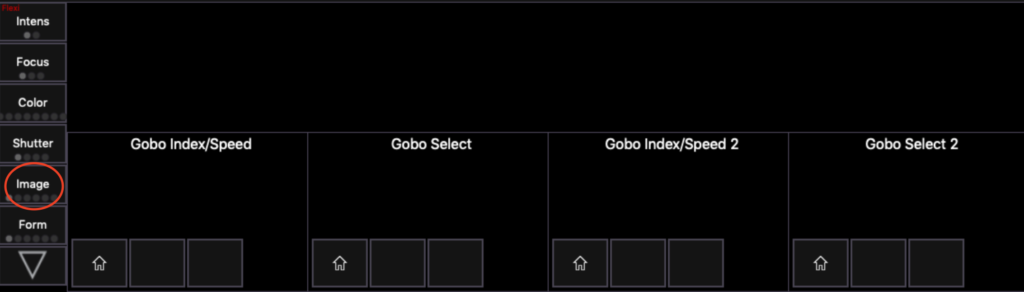
When you press the Tile on the left that says Image, it will bring you to the Gobo Select area which will now be accessible on your encoders.
Now everything is set, so let’s record our Snapshot. [Record] {Snapshot} 3 but don’t press Enter yet. In the dialogue box, select Encoder and Filter and press [Enter] twice.

Now, touch the camera icon in the upper right corner of your screen and select Snapshot 1. Then select Snapshot 3 and notice the appearance of the Ns on your Live Table for Null, and notice your encoders are set to the right selection. I love this detail with my entire heart.
It’s amazing how much mileage you can get out of Snapshots if you give it some thought. What are your favorite ways to manage views? Comment below.